People normally get access to your products by buying an offer. Sometimes you need to do it yourself: comping a course for a partner, honouring a purchase made somewhere else, or fixing a one-off problem. This article covers every way to give access without a purchase, and how access is removed.
Who can do this
- Owners and admins can grant offers on the New contact form, and use Grant a member list and Bulk access re-grant in Settings. Staff don't see the Grant offers box.
- Automations that grant or revoke offers run on their own once someone who can build automations sets them up; see Automations.
- Everyone on the team can see a contact's access on their record's Products tab.
Give access to a new contact
- Go to Contacts → All people and click New contact.
- Fill in the Email and any other details.
- In Grant offers, pick the offer. Hold ⌘ or Ctrl to pick several, up to 10. Only published offers are listed, each shown as the offer name and its product.
- Click Create contact.
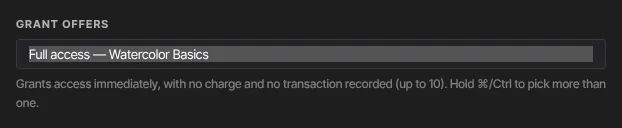
The contact gets every product each offer includes, straight away. They aren't charged and no order is recorded. Help with the rest of the form is in Add a contact by hand.
Give access to people already on your list
The contact record has no grant button. Use one of these instead:
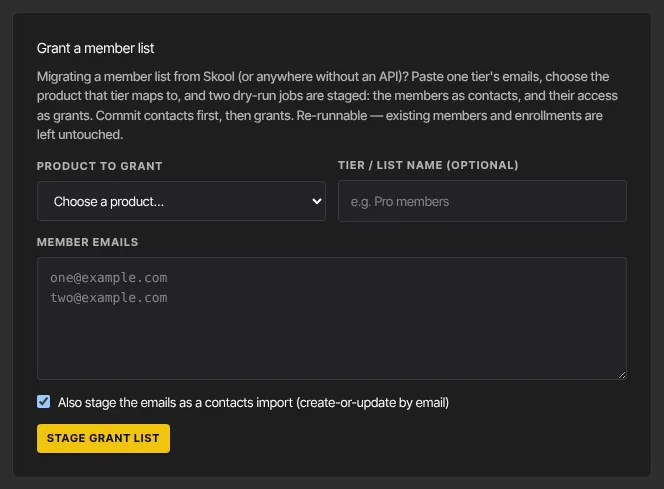
- Grant a member list (owners and admins): go to Settings → Import & migrate and find Grant a member list. Choose the Product to grant, paste one or more emails into Member emails, and click Stage grant list. Then open each staged import under Recent imports and click Commit import: the contacts first, then the grants. People who already have access, or whose access was removed earlier, are left as they are. See Import and migrate from another platform.
- An automation: use the trigger Tag is added with a tag such as "comp-watercolor", and the action Grant an offer. Then add that tag to the contact on their record. This gives access to the product the offer is for.
- Bulk access re-grant (owners and admins): after you migrate purchase history, the Bulk access re-grant panel on the same Settings page gives every contact what their imported purchases and active subscriptions include. Click Preview re-grant, then Apply N grant(s).
Check what someone can access
- Open the contact's record.
- Click the Products tab. It lists each product with its Type, Progress, Status (active, completed or revoked) and Enrolled date.

Remove access
The Products tab is read-only, with no remove button. Access ends when:
- You refund a one-time purchase in Transactions: the access that purchase gave is removed. See Transactions and refunds.
- A subscription ends: access to what it included ends.
- An automation runs Revoke an offer: for example, trigger Tag is added with a tag such as "remove-access", and action Revoke an offer. It removes access to the product the offer is for.
- You delete the contact: all their access goes. See Delete contacts.
When access is removed, the person keeps any product they also own another way, such as through a separate purchase.
What happens next
- Granted: the product appears in the person's library on your school's site, such as yourname.zinstruct.com, when they sign in with that email. We don't email them to say so, so tell them yourself. If the course drips lessons, the usual unlock emails go out on schedule. For a community product, you get a new-member notification.
- Removed: the product disappears from their library.
- Both show on the contact's Lifecycle tab, as Granted access to a product or Access revoked.
Common errors
- "Only an admin can grant offers when creating a contact.": you're signed in as staff. Ask an owner or admin.
- "Contact created, but these didn’t apply: an offer that no longer exists. …": the offer was deleted while you filled in the form. The contact was saved; give access another way, as above.
- No Grant offers box: you're not an owner or admin, or you have no published offers. See Create an offer.
- "Only owners and admins can run imports." or "Only owners and admins can re-grant access.": ask an owner or admin.