An automation does work for you in the background. You choose what starts it (the trigger, under When), who it applies to (optional conditions, under But only if), and what it does (actions, waits and branches, under Then). Once it's published, it runs for every contact the trigger fires for, so tagging, granting access and follow-up emails happen without you.
Who can do this
- Owners, admins and staff can create, edit, publish and unpublish automations.
- Only owners and admins can delete one.
- Viewers can open the list and the builder, but Save draft and Publish show "You don’t have permission for this."
- Creating a new automation needs the Core plan or higher. On the trial, the builder opens, but saving shows the upgrade message below. Automations you already have stay editable on any plan. See Plans and billing.
- Your plan also sets how many automations can be live at the same time.
Create an automation
- Go to Marketing → Automations (
/marketing/automations) and click New automation. - Type an Automation name, such as "Tag new buyers".
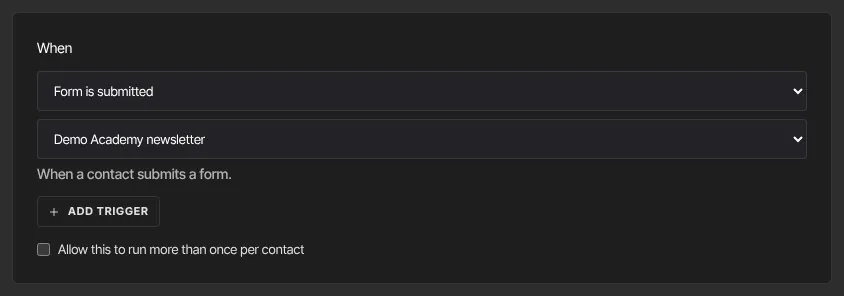
- Under When, pick a trigger. Most triggers have a second menu to pin it to one offer, product, tag, form, sequence, event or quiz. Leave it on Any … to react to all of them. The hint under the menu says exactly when it fires.
- Optional: click Add trigger to add another trigger, up to 10. Any one of them starts the flow.
- Optional: tick Allow this to run more than once per contact (see "What happens next").
- Under But only if, leave "No conditions — runs for every matching trigger.", or tick Add conditions. Choose whether to match all or any of the rules, then build each rule from a field, a comparison and a value. Add condition adds another rule.
- Under Then, choose the first action and its target, for example Add a tag and the tag. Click Add action for more. Every action is listed in Automation triggers and actions.
- Click Save draft to keep it switched off, or Publish to save it and switch it on. A new automation then opens on its own page.
Conditions on contact details, such as Email, Marketing status, Country or Created date, work as you'd expect. Tag, Product access and the purchase fields only work with the item's ID in the value box: if you type a name, that rule is skipped. To act on a tag, use the Tag is added trigger instead.
Add waits and branches
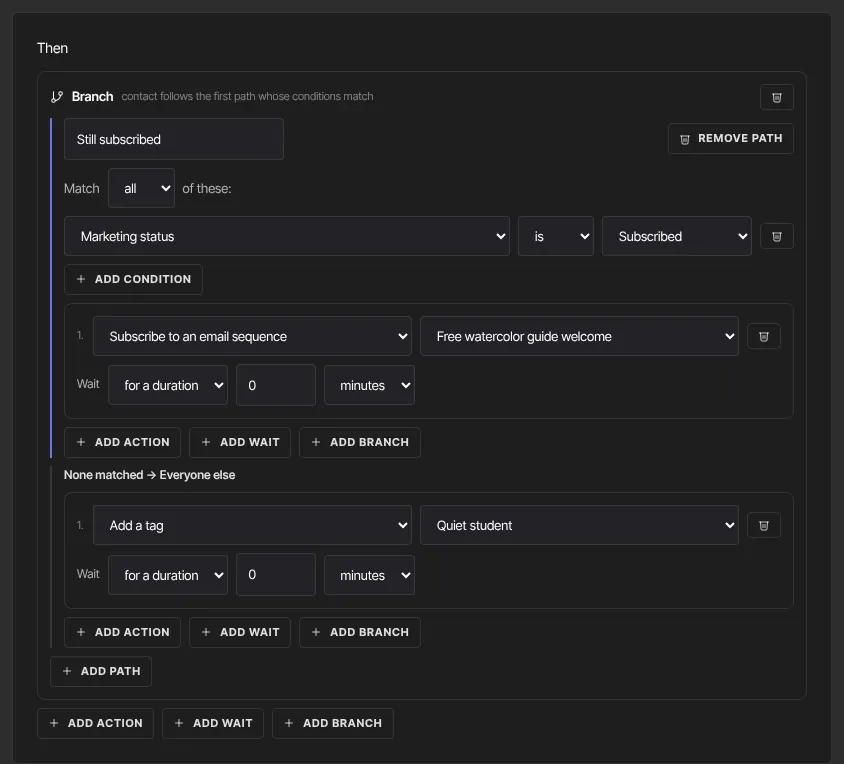
- Every action has its own Wait line. Choose for a duration (up to 365 minutes, hours or days) or until a date (in UTC) to pause before that action runs. Leave it at 0 to run straight away.
- Add wait adds a separate pause step that reads "then continue".
- Add branch splits the flow. Each path has a name and its own conditions, and the contact follows the first path whose conditions match. Everyone who matches none follows None matched → Everyone else. Add up to 5 paths with Add path. A path can hold another branch, up to four levels of branches in all; past that, Add branch no longer appears.
- A flow can't end on a wait. Add an action after it.
Watch it run
The list shows each automation's When, Then, If (conditions or not), Runs and Status (Live or Draft).

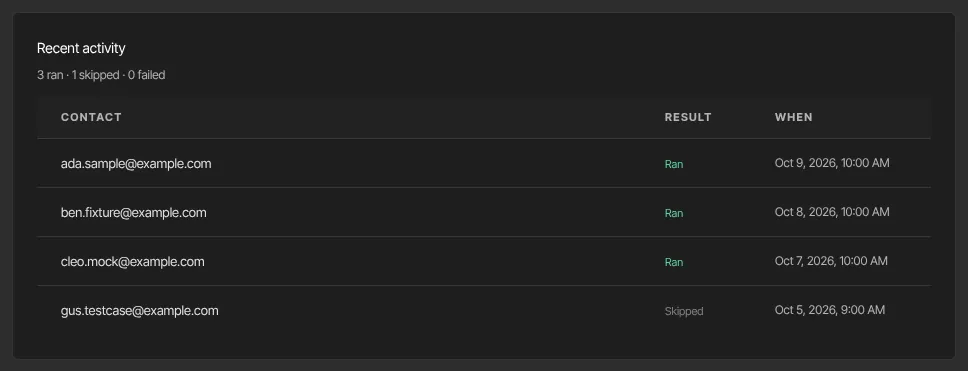
Open an automation to see Recent activity under the builder: the last 25 contacts it fired for, each marked Ran, Skipped or Failed, with the time. A failed run shows its error. A contact who is still part-way through, waiting on a step, shows running.
Edit, unpublish or delete
- Click the automation's name in the list.
- To change it, edit the builder and click Save draft. On a live automation this changes the live flow straight away, without the checks Publish runs. To be safe, Unpublish, edit, then Publish again.
- To switch it off, click Unpublish. Its status goes back to Draft.
- To delete it (owners and admins), click Delete, then Confirm delete.
What happens next
- Each contact goes through an automation once. With Allow this to run more than once per contact ticked, they go through again each time the trigger happens again, with one exception: the same form, tag or sequence counts only once. A contact who submits the same form twice still runs through it once.
- Conditions are checked when the trigger fires. A contact who doesn't match is marked Skipped, and doesn't enter that automation later unless it can run more than once per contact. Branch conditions are checked when the contact reaches the branch.
- Unpublish and Delete stop new contacts from entering. Contacts already waiting part-way through still receive the remaining steps, and there's no way to stop those.
- Send an email only reaches contacts subscribed to your marketing email. Details are in the reference.
Common errors
- "Add at least one action." or "Add at least one action — this automation does nothing yet.": the Then section has no action. Add one.
- "Flow ends on a wait — add an action after it (a flow can't end on a wait).": remove the last wait, or add an action after it. In a branch the message names the path, such as "Flow › branch path 1".
- "Flow: an action needs you to pick a tag." (or an offer, a sequence, a product or an automation): choose the action's target.
- "Flow: a "Send an email" action has no subject." or "…has no body.": fill both in.
- "Flow: a "wait until a date" is set in the past — contacts would never advance.": pick a future date.
- "Flow: branch path "Path 1" has no conditions.": give the path at least one complete rule.
- "Plan limit reached for automations active (…). Upgrade or request an override.": you're at your plan's limit of live automations. Unpublish one, or see Plans and billing.
- "Automations & sequences is included from the Core plan up. Subscribe in Settings → Billing to unlock it.": your workspace is on the trial.
- "You don’t have permission for this.": you're a viewer. "You don’t have permission to do that." appears when staff or viewers try to delete.
- "Could not save the automation.": try again in a moment.