Most people join your list on their own: they buy, fill in a form, or arrive in a CSV import. Use the New contact form for everyone else, such as a client who paid you offline or someone you met at an event. In one step you can tag them, set their marketing opt-in and, if you're an owner or admin, give them access to your products.
Who can do this
- Staff, admins and owners can add contacts.
- Only owners and admins see the Grant offers box. Staff can add the contact but can't hand out product access.
- Viewers see the form, but Create contact shows "You don’t have permission for this." and nothing is saved.
Each contact you add counts toward your plan's contact limit; see Plans and billing.
Add a contact
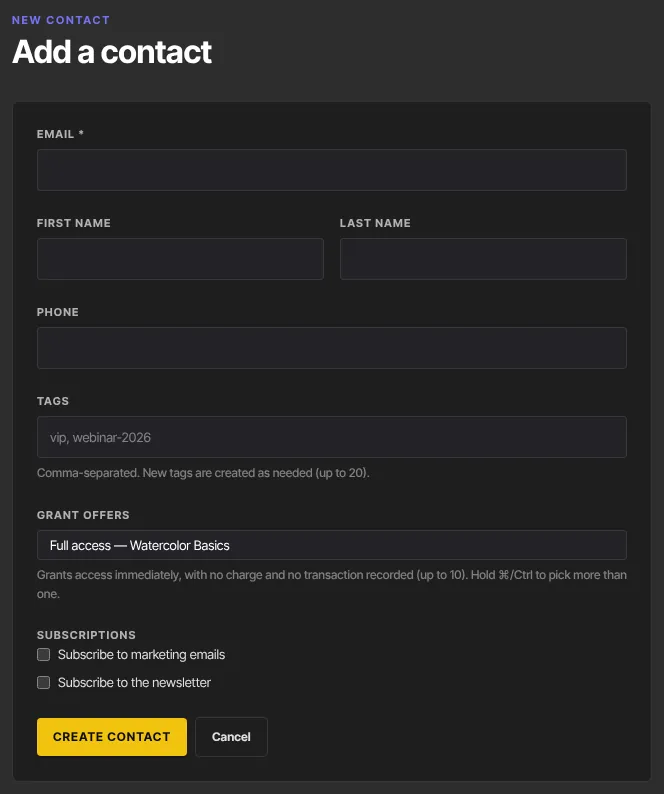
- Go to Contacts → All people and click New contact. You can also use the Add contact shortcut on your Dashboard, or Add your first contact on an empty list. The page is titled Add a contact (
/contacts/new). - Enter the Email. It's the only required field.
- Optionally fill in First name, Last name and Phone.
- In Tags, type tag names separated by commas, for example
vip, webinar-2026. Tags that don't exist yet are created for you, up to 20 at a time. Capital letters count: "VIP" and "vip" are two different tags. - Under Subscriptions, tick Subscribe to marketing emails only if this person agreed to get your marketing email. Leave it unticked and they start as unsubscribed.
- Click Create contact. You return to the Contacts list with the new person at the top.
If someone gave you permission offline, tick the marketing box and write down where the consent came from on their Notes tab. See Email preferences and unsubscribes.
Give them access while you add them (owners and admins)
- In Grant offers, click an offer. Hold ⌘ (Mac) or Ctrl (Windows) to pick more than one, up to 10. Only published offers are listed, each shown as the offer name and its product.
- Click Create contact.
The person gets every product each offer includes, straight away. They aren't charged and no order is recorded. For every other way to give or remove access, see Give or remove product access by hand.
About the newsletter box
Subscribe to the newsletter is saved on the contact, and Quick view shows it as newsletter: on. It doesn't decide who receives your newsletter issues: issues go to people with access to the newsletter product whose marketing status is subscribed.
What happens next
- The contact appears at the top of your Contacts list, and their record's Lifecycle tab starts with a Contact created entry.
- Automations that start with Contact is created run for them, and so do Tag is added automations for the tags you typed.
- We don't email the person. If you gave them access, tell them they can sign in to your member area with this email address.
Common errors
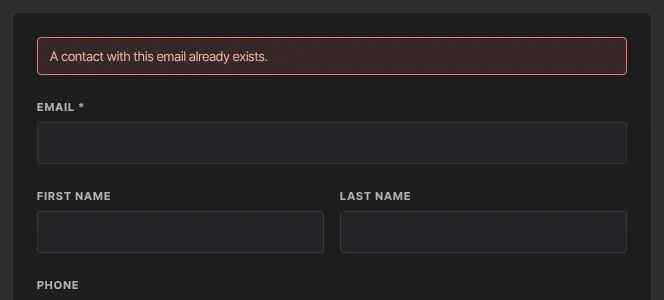
- "A contact with this email already exists.": this email is already on your list (capital letters don't matter). Search for it on the Contacts list and edit that record instead.
- "Please fix the highlighted fields.": read the note under the field, usually an email address that isn't valid.
- "You've reached your … plan's limit of … contacts. Upgrade in Settings → Billing to add more.": you're at your plan's contact limit. See Plans and billing.
- "Only an admin can grant offers when creating a contact.": only owners and admins can grant offers. Leave Grant offers empty, or ask an admin. Nothing was saved.
- "Contact created, but these didn’t apply: …": the contact was saved, but a tag or an offer didn't go through, for example an offer deleted while you filled in the form. Open the record and add what's missing.
- "Could not create the contact. Please try again.": a problem on our side. Try again.
- "You don’t have permission for this.": viewers can't add contacts.