Your workspace has one community. An access group is a members-only group inside it, and every community product you create is exactly one access group. Whoever has access to that product is a member of that group and sees that group's spaces, posts, meetups and challenges.
If you are looking for "user groups" or "member groups", this is the feature. In the app it is always called an access group.
Who can do this
- Owners, admins and staff can create access groups and change their tabs.
- Only owners and admins can publish or unpublish one. Staff get "You don’t have permission to do that."
- Viewers can look but not change anything: saving says "You don’t have permission for this."
Why run more than one
One group is enough to start. A second one earns its place when different members should get different things:
- Tiers. A free community and a paid mastermind side by side, each with its own conversation, and nobody wanders into the paid one.
- Cohorts. One group per intake, so each cohort talks among itself instead of scrolling past last year's threads.
- A community that comes with a course. Put the community product and a course in one offer: buyers get both, and the group only contains people who bought.
Each group has its own:
- Spaces: the channels its members post in. See Spaces: your community channels.
- Branding: banner, logo and cover, on the group's Brand tab. See Brand your community.
- Feature list: challenges, meetups, leaderboard, messages, live and members can each be shown or hidden per group. See Show, hide and rename community features.
- Meetups, challenges and feed to run and moderate.
Shared by every group, and set once under Community Settings: members and roles, bans, gamification, share and social, the tagline and community guidelines, feature renames and the live-room link.
Set one up
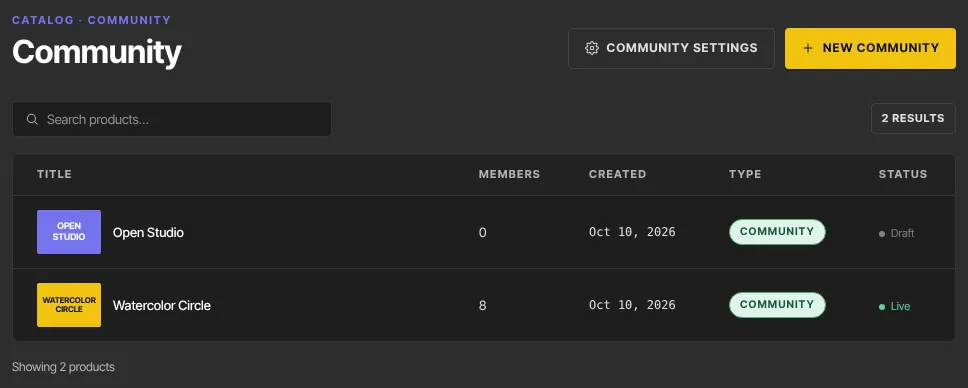
- Go to Catalog → Community and click New community. Or click add another access group on any group's Access group tab: it opens the new-product picker with Community chosen, so click Get started. Fill in the Title and click Create community. The access group is created with the product, unnamed. It comes with one space called General, so members have somewhere to post from the start. A community product created through the API or a catalog import is set up the same way.
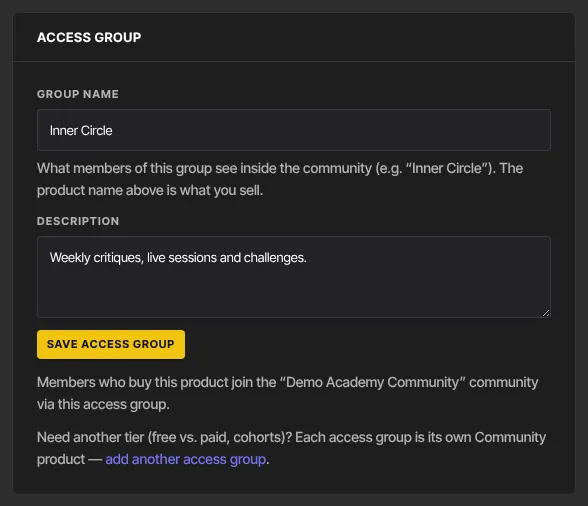
- The product opens on its first tab, Access group. It holds the group's Group name and Description, and the panel beside it shows Members in this group.
- Give it a Group name: what members of this group see inside the community, such as "Inner Circle". The product's own name is what you sell. Add a Description, then click Save access group. "● Saved" appears. Until the group has a name, members see the product's name instead.
- Work through the other tabs: Spaces for the channels, Brand for the look and the feature list, Meetups and Challenges if you use them, and Offers to see what sells this community and add upsells, downsells and order bumps.
- Click Preview to see it as a member will, then Publish access group in the product header.
- Sell it: put the product in an offer. Everyone who buys joins the group. To add someone by hand, grant them the offer; see Grant and revoke access.
Until the group is published, a member who already has access sees "This community isn’t available right now" instead of the community.
Edit one
Open Catalog → Community and click the product. Every tab edits this group only.
- Rename it or change its description: Access group tab → edit → Save access group. Members see the group name on its community pages, for example "Community · Inner Circle" above Meetups and Members. The Community panel beside it renames the whole community instead: your community's brand, which members of every group see in the sidebar and the welcome banner.
- Change what members can use: Brand tab, with the branding and the six show/hide ticks.
- Organise the conversation: Spaces tab. Add, rename, reorder, make a space read-only, or hold posts for review.
- Moderate: Posts tab.
- Take it offline: Unpublish in the product header. Members keep their access and the group comes back when you publish again.
- Remove a member: revoke the offer that gave them access, see Grant and revoke access. To keep someone out of every group, ban them; see Community members, roles and bans.
What happens next
- A member's Community page shows a card for each group they belong to. Someone with access to two community products sees two groups, each with its own spaces and feed.
- A new group name shows up for members the next time they open a community page.
- The Members & roles list on Community Settings shows everyone across all your groups, with a button per group to narrow it down.
Common errors
- "Could not save the access group.": try again in a moment.
- "You don’t have permission for this.": your role is viewer.
- Members see the product's name instead of the group name: the group has no name yet. Fill in Group name and click Save access group.