Branding makes your community feel like yours. Each community product has its own logo, sidebar cover and welcome banner, and can promote offers to its members. The whole community also has a tagline, a share link, fallback images, a brand colour and social links, set once for every product.
Who can do this
- Owners, admins and staff can change branding and identity.
- Viewers can open these pages, but saving says "You don’t have permission for this."
Brand one community product
- Open the community product and click the Brand tab (
/products/<id>/community?tab=settings). - Under Branding — this community, set any of these:
- Community logo (top of the sidebar): use Upload image, Choose from library, or Remove. Once a logo is set it shows in place of the community name at the top of the sidebar. A transparent PNG works best. - Cover image (sidebar header — this community): upload, then use Adjust crop to pick the part that shows. Leave it empty to use the whole-community fallback cover. - Feed banner image: the picture behind the welcome banner. It wins over a banner colour. - Use a solid banner color (when no banner image is set): tick it and pick a colour. - Banner headline: the banner text. Style it with B, I, U, left, center or right alignment, Size and Color. Leave it empty to show "Welcome to" and your community's name.
- Check the Banner preview (as members see it).
- Click Save brand. "Saved" appears.
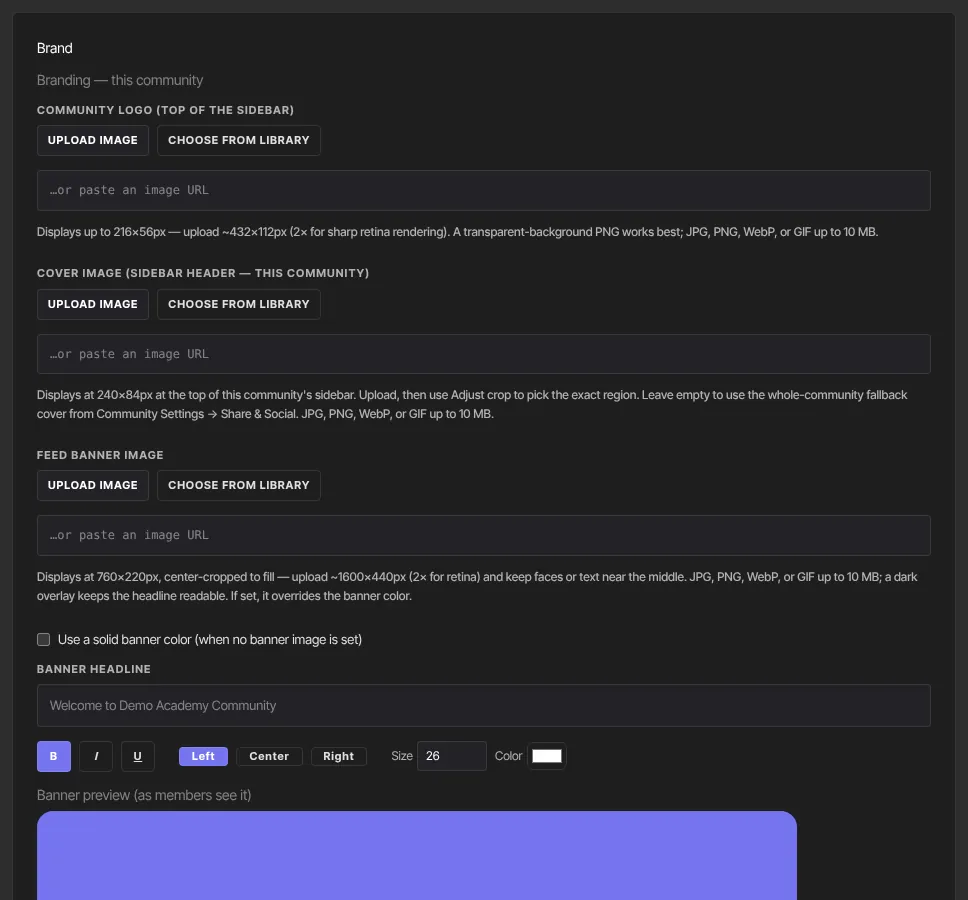
Images can be JPG, PNG, WebP or GIF up to 10 MB.
Promote offers to members
- On the same Brand tab, find Promote offers to members (right rail).
- Tick the published offers you want members of this product to see.
- Click Save brand.
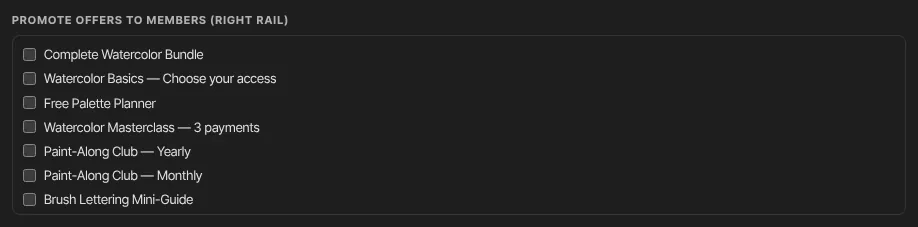
Each promoted offer shows as a card in the right-hand column of the community's feed, with its price and a View offer button that opens its checkout. To promote challenges, use the Challenges tab; see Challenges, points and the leaderboard.
Set the tagline
- Open Community Settings and stay on General.
- Type a Tagline: a short line under the community name in members' sidebar.
- Click Save community settings.
Share link and social links
These apply to every community product.
- On Community Settings, click Share & Social (
/products/community-settings?tab=identity). - Set the Share link slug, such as "watercolor-circle". Members who already have access can then open your community at
/join/watercolor-circleon your school's site, such as yourname.zinstruct.com. - Optionally set Fallback Community Logo (when a Community has none), Fallback cover image (when a Community has none) and Brand color (hex), such as #7c5cff. The brand colour is used for the community name in the sidebar.
- Add links for Website, Facebook, Instagram, YouTube and X.
- Click Save share & social.
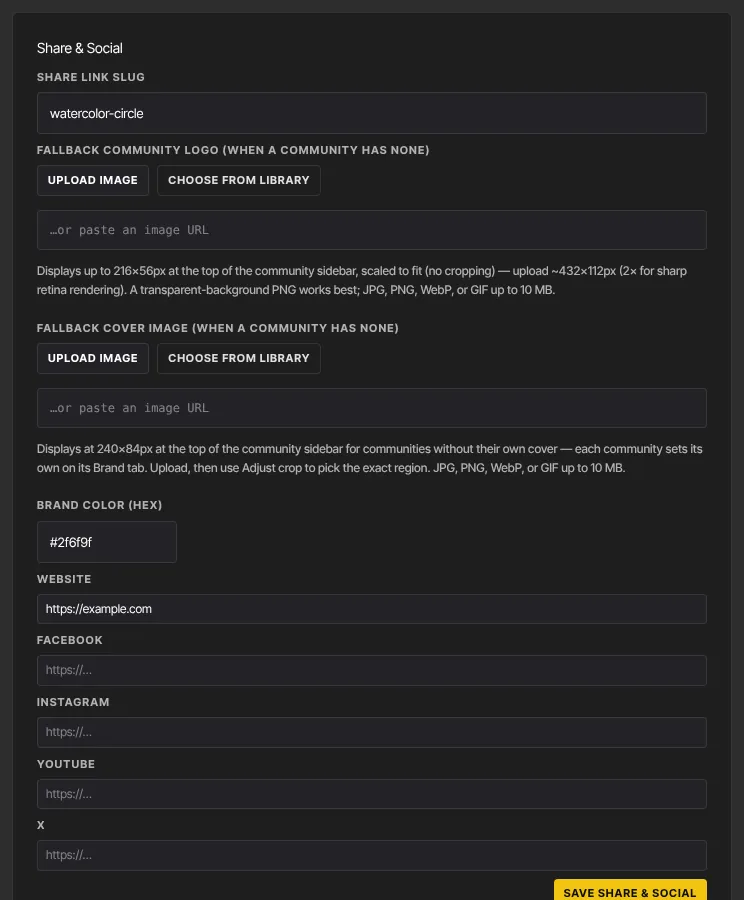
The share link only takes people who already have access straight into their community. It doesn't sell the community or let anyone else in: someone without access sees Members only. To sell, share the offer's checkout link.
What happens next
- Members see the new logo, cover, banner and promoted offers the next time they load the community.
- Social links appear at the bottom of members' sidebar.
- A slug or colour that isn't valid is dropped when you save, so check the field afterwards. A slug uses lowercase letters, numbers and hyphens, 3 to 60 characters.
Common errors
- "Community product not found.": the page is out of date. Reload it and save again.
- "Could not save settings.", "Could not save community settings." or "Could not save share & identity.": try again in a moment.
- "No community found.": you haven't created a community product yet. Create one first; see Create, preview and publish a community.
- "No published offers yet." under Promote offers to members (right rail): publish an offer first; see Create an offer.