Community AI is an assistant that takes part in your community. It writes posts, answers members' questions and reports on how the community is doing, drawing only on sources you give it. Everything it writes carries an AI badge, and you can delete anything it posts.
It's switched on per workspace by Zinstruct, not by plan. If you don't see a Community AI tab on Community Settings, it isn't enabled for your workspace; contact support to ask about it.
Who can do this
- Owners and admins can change every Community AI setting.
- Staff and viewers can open the tab and read it. Saving a form says "You don’t have permission for this." and buttons such as Refresh or Remove do nothing.
- Staff can also export the insights; see Community AI: activity, flags, insights and billing.
Turn the assistant on
- Open Community Settings and click Community AI. You start on Overview.
- In Switches, tick Agent on, then choose what it may do: Posts, Replies and Insights.
- Click Save. "Saved." appears, and the status line updates.

Unticking Agent on pauses everything; nothing queued is lost.
Give it sources
The assistant only writes from what your sources contain. It doesn't search the web.
- On Overview, under Sources, pick a Type: RSS/Atom feed (such as your blog's feed), Single page URL, or YouTube if it's listed for your account.
- Paste the URL and, optionally, a Title (optional).
- Click Add source. The message says "Added “…”. Its content is importing now — the status changes from pending to ok when it’s ready."

- To add a file, use Document (PDF, DOCX, MD, TXT), choose the file, add an optional Title (optional) and click Add document.
- The list shows each source's health: pending, ok, failed (with the reason) or paused, and when it was last fetched.
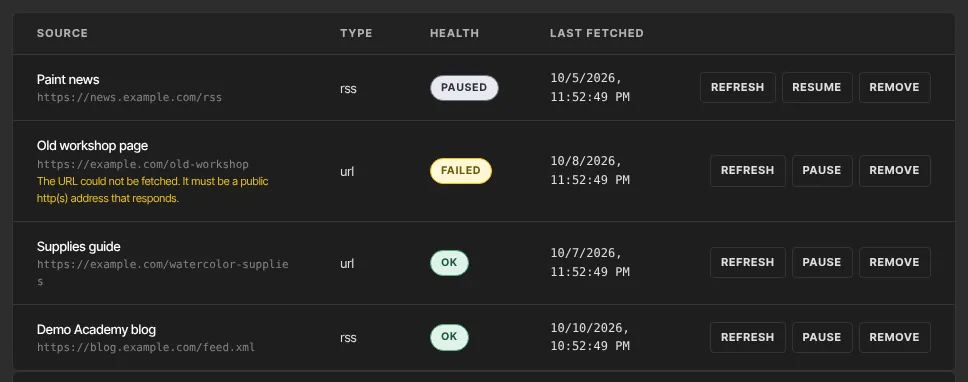
Feeds are checked again every hour and YouTube sources once a day. Single pages and documents are only fetched again when you click Refresh. Pause stops a source being refreshed until you click Resume, and Remove deletes it at once, with no confirmation. Posts it already helped write stay. For YouTube, only each video's title and description are used. The line above the form shows how many sources your plan allows.
Set its name, voice and schedule
- Click Settings in the Community AI section switcher.
- Under Agent identity & voice, set Name (always shown with an AI badge), an Avatar (optional), the Tone, a Writing sample to emulate (optional), Banned phrases (comma-separated) and a Reading level (optional). Click Save identity. A new name also replaces the name on its past posts.
- Click Generate a sample post to try unsaved voice settings. A Sample preview (not published) appears. Each sample uses part of your Community AI allowance.
- Under Content, set Posts per week (0–7), tick the Posting spaces, set Quiet from and Quiet until (like 22:00 and 07:00), the Timezone (like America/New_York) and Post length (words). Click Save content settings.
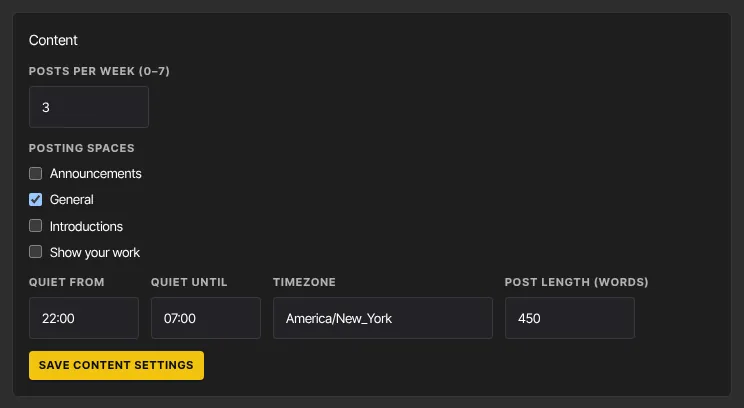
Posting spaces lists every space in all your community products by name. If two products both have a space called General, you'll see two General boxes. Avoid spaces that hold posts for review: the assistant's posts there wait in Pending for your approval.
Set how it replies
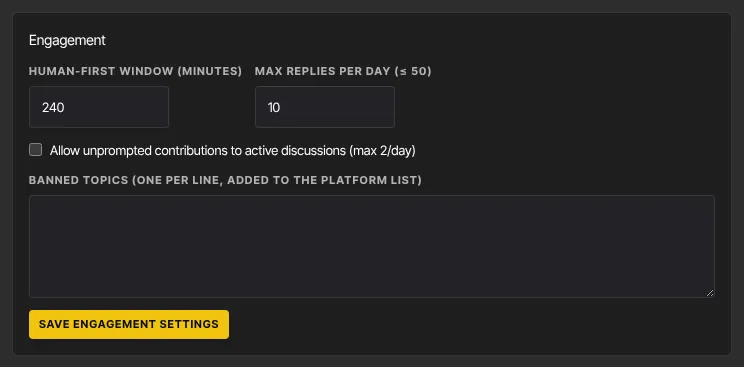
- Still on Settings, under Engagement, set the Human-first window (minutes): how long it waits after a member asks a question, so people get the first chance to answer.
- Set Max replies per day (≤ 50).
- Tick Allow unprompted contributions to active discussions (max 2/day) if it may join busy threads it wasn't asked into.
- Add Banned topics (one per line, added to the platform list).
- Click Save engagement settings.
What happens next
- With Posts on, it posts in your posting spaces at the rate you set, outside quiet hours.
- With Replies on, it answers a member's question once the human-first window has passed, unless someone has already replied. A member who mentions it by name gets an answer straight away.
- It doesn't reply to posts that need a person, such as someone in distress or abusive content. It flags them for you and the owner is emailed. See Community AI: activity, flags, insights and billing.
- If it skips three scheduled posts in a row because it has nothing new to say, the owner gets one email suggesting fresh sources.
Common errors
- "You don’t have permission for this.": only owners and admins can change Community AI.
- "Enter a full http(s) URL.", "The URL could not be fetched. It must be a public http(s) address that responds.": check the address opens in a browser.
- "That URL is not an RSS or Atom feed. For a regular page, add it as a URL source.": choose Single page URL.
- "Your plan allows … knowledge sources. Upgrade to add more.": remove a source or upgrade.
- "Choose a file first.", "Upload a PDF, DOCX, Markdown, or plain-text file.", "File must be 15 MB or smaller.": check the file.
- "Give your assistant a name.", "Use HH:MM.", "At least 100 words.", "Platform ceiling is 50 replies/day.": fix the field shown.
- A source stays pending: click Refresh. If it shows failed, the reason appears under it.