Every new website page starts from a template: a ready-made layout of sections and blocks that you then edit. It's a head start, not a constraint: you can change everything afterwards. All templates live on one page, Website → Templates: ours and yours, for website pages, landing pages and blog posts. This article covers choosing a layout, the blocks you need to connect, and applying a template to a page you've already started.
Who can do this
- Staff, admins and owners can create pages from a template and save drafts.
- Only owners and admins can publish. Staff who click Publish get their draft saved, then "You don’t have permission for this."
- Viewers who click a template card see "You don’t have permission to do that." and no page is created.
- Website pages don't count toward a plan limit. Landing pages do; see Landing pages.
Pick a starting point
- Go to Website and click New page. The Templates page opens on its Website pages tab, headed New website page and Choose a template. ← Website pages takes you back.
- Blank page is always the first card (top left), whatever you search for or sort by: an empty canvas if you'd rather add every section yourself. To start from a layout, narrow the list if you like, then click the card you want. The Landing pages and Blog posts tabs work too: any template can start a website page.
- Search templates finds a word in a layout's name or description. - The category tabs show one group at a time: All, Business & services, Courses, Coaching, Events & webinars, Pricing, Personal & author, Blog and Community & nonprofit. - The sort menu orders the cards: Recommended (category by category, in the order of the tabs, and in the designer's order within each), Name (A–Z), Name (Z–A), Shortest page first or Longest page first.
Each card shows the top of the layout itself, as a page made from it would look. While your site still has the default look (you haven't changed its colours or fonts in the Style Guide), each layout shows in its own example palette, such as Clay or Night. Once your site has its own colours or fonts, every card shows those instead. Down the right edge of each card is a tiny picture of the whole page, with the part the card shows outlined. Rest your mouse on a card to see the whole page (see Preview a template below). Every layout and what it contains is listed in Every template, by category.
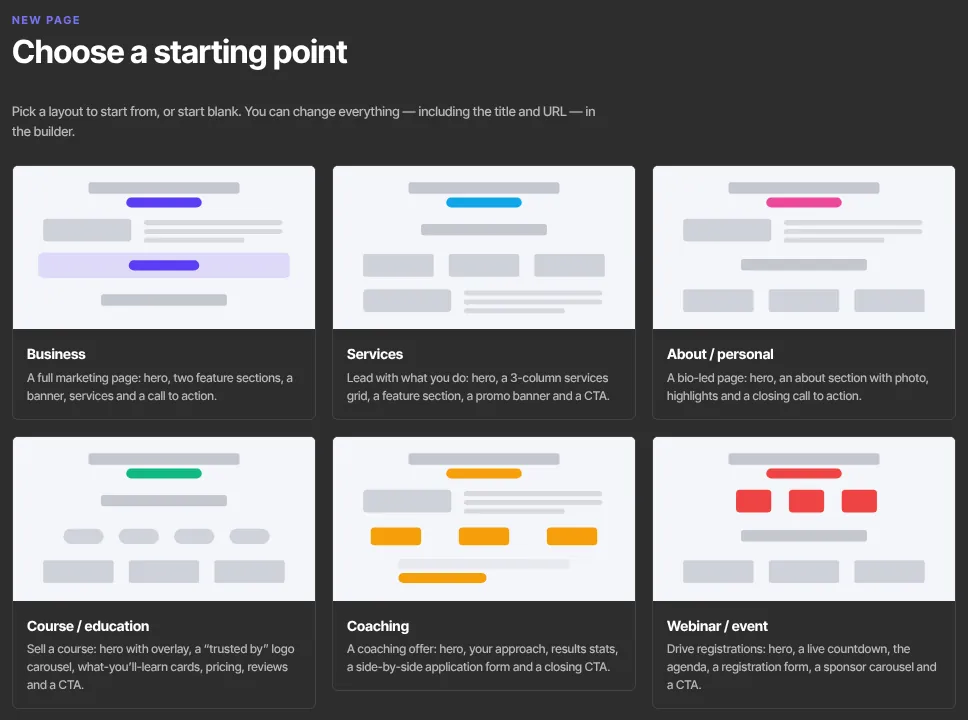
- The card shows Creating…, then the new draft page opens in the builder. Nothing is public yet.
Start from the Templates page
You can also start on Website → Templates (/website/templates):
- Pick a tab: Website pages, Landing pages or Blog posts. Each has the same search, category tabs and sort menu.
- Click a template. Use this template asks where you want to use it: New website page, New landing page or New blog post. The kind it was made for comes first, marked "what it was made for", but any of them works.
- Click one. The card's layout opens in the builder as a new draft of that kind.
Preview a template
Rest your mouse on any template card except the blank one and a preview opens beside it, without leaving the Templates page. It shows the template's whole page, laid out as on a laptop screen and shrunk to fit. Scroll inside it to see all of it; the bottom line says how many sections it has. Move your mouse into the preview to scroll it or pick a palette; move it off both the card and the preview, press Esc or click × to close it. With the keyboard, press Tab to reach a card and its preview opens straight away: ← and → change the palette, ↑ and ↓ scroll the preview and Enter uses the template. On a phone, a tablet or a narrow window, tap a card to open its preview from the bottom of the screen. The arrow icon at the top opens the preview on its own page in a new tab.
Under the template's name you'll see the palette it's shown in and its two fonts, for example Bloom (default) · Lora / Nunito Sans. The row of swatches below it lets you try the template in each of the eight palettes. Each swatch shows the palette's background, main colour and button (or dark) colour. Click one and the preview changes, and so does the template's card, until you leave the Templates page. While your site still has the default look, the template opens in its own palette, marked (default). Once your site has its own colours or fonts, the cards and the preview show those: the first swatch is Your site (picked to start with), and the template's own palette is marked (template’s). Click Your site to go back to your look.
- Came from New page (or New landing page or New post)? Click Use template at the bottom of the preview to make that kind of page from it.
- Opened the Templates page from the menu? Use template asks where to use it: New website page, New landing page or New blog post.
Previews show the finished page. Pricing sections show sample plans, such as Starter, Pro and Premium, and forms show a sample Name and Email form. On your page you link your own offers and forms in the builder. Links, buttons and forms in a preview don't do anything yet. You connect them in the builder.
Also apply the template's palette
An admin or owner can take a palette as well as the layout.
While your site still has the default look:
- From New page, New landing page or New post, tick Also apply the template’s palette to my site above the cards, then click a card or Use template in its preview. If you picked another palette in the preview, that's the one you get.
- From the menu, tick Also apply the name palette to my site before you choose where to use the template. It names the palette the preview was showing.
Once your site has its own colours or fonts, only a palette you pick in a preview can replace them; a template's own palette never does unasked:
- From New page, New landing page or New post, tick Replace my site’s colours and fonts with the palette I pick in a preview above the cards, then pick a palette in a template's preview and click Use template (or the card). With Your site picked, nothing changes.
- From the menu, pick a palette in the preview first; then tick Replace my site’s colours and fonts with the name palette before you choose where to use the template.
It's unticked unless you tick it. When ticked, your site's colours and fonts become the palette's, exactly as if you'd applied it in the Style Guide's Palettes panel. That changes every page, not just the new one. The page is still created if the palette can't be saved, and you can change the palette any time in the Style Guide. Staff don't see the option.
Make it yours with AI
When AI is available for your account, a tip at the top of the Templates page reminds you that you can use AI on a template; click × to hide it (it stays hidden in that browser). Pick the template first. Then, in the builder, click AI; on a page made from a template, the panel opens on Edit this page. Describe your business and anything to change, for example "Rewrite this for my yoga studio in Austin, warm tone. Add a class schedule and an FAQ after the reviews; remove the client logos."
The AI starts from the template, not from scratch:
- Everything stays unless you ask to change it: every section and block, in the same order, with the same design. The template's placeholder words, such as [YOUR BUSINESS], are rewritten for your business.
- Sections are added when you ask. Name the blocks you want, or let the AI choose ones that suit.
- Sections are removed or moved only when you ask.
- It doesn't make up prices, numbers or customer names you didn't give it.
You review the result section by section before anything changes, then Save draft. See Build a page with AI.
Make it yours
- Name and URL. The page starts out named after its template, with a URL like
business-1a2b3c. Rename it in the title box at the top of the builder. The URL beside it follows the title until you publish the page or edit the URL yourself. - Words and pictures. Click any block to edit it. The headings and text are placeholders: replace them all. The photos are yours to use as they are, or swap in your own; the client logos are made-up examples, so replace them with real ones or remove them. A dashed Add an image or Add a logo box is an empty slot: click it to upload. Empty slots don't show on your live page.
- Changed a photo and want it back? Every photo our templates use stays available: see Template images below.
- Sections. Add, remove or reorder sections and blocks as you like. See the Block catalog for everything you can add.
- Look. Colours and fonts come from your Style Guide, so a template matches the rest of your site automatically.
Connect the blocks that need your data
Some templates contain blocks that show nothing useful until you point them at something real:
- Course / education, Course — curriculum, Course — video first and Event — virtual summit have an Offer block. Select it and pick a published offer in its Offer setting, so the page shows your real price and checkout.
- Services — packages, Coaching — group program, Event — in-person workshop, Pricing — three tiers, Pricing — one plan and Membership / community have a Pricing block. Select it and pick an offer in each plan's Offer setting; each card shows that offer's price and checkout button. In Services — packages and Pricing — three tiers the middle plan says Most popular: change or clear it in that plan's Badge.
- Course — curriculum has a Course outline block. Pick the course in its Course setting to list its modules and lessons.
- Services — process, Contact / work with me, Newsletter home, Podcast / show, Coaching, Coaching — book a call, Webinar / event, Event — virtual summit, Author / speaker, Blog home: featured, Blog home: list, Consultant / agency and Nonprofit / cause have a Form block. Pick the form in its Form setting. Form submissions create a contact; they don't enrol anyone or take payment. See Forms and opt-ins.
- Webinar / event, Coaching — group program and Event — virtual summit have a Countdown block. Set its Target date & time.
- Course — video first and Author / speaker have a Video block. Paste a YouTube, Vimeo or video-file link in its Video URL setting.
- Results / case studies and Podcast / show have a Video gallery block with three empty slots. Add a YouTube or Vimeo link to each under Videos.
- Contact / work with me has a Scheduling block. Paste your booking page link in its Booking URL setting.
- Podcast / show has a Text & audio block for the latest episode. Paste the episode's file link in its Audio file URL setting.
- Some cards in Services, Services — process, About / personal, Contact / work with me and Course catalog have a button label ready ("Learn more", "Details", "View course"…). The button shows once you add the card's link.
Preview and publish
- Preview saves your draft and opens the page in a new tab, the way a visitor will see it.
- Save draft keeps your changes without making them public.
- An owner or admin clicks Publish to put the page live. After that the button reads Publish changes whenever there's new content waiting, and Unpublish takes the page offline again.
On a live page, the content and design wait for Publish changes, but a new title, URL or Members only setting applies as soon as you save. Full details are in Publish, unpublish or delete a page. A new page isn't added to your site menu automatically; see Navigation menus.
Already started a page?
- Open the page and click Templates in the editor toolbar. Any unsaved changes are saved to the draft first (nothing is published); if that save fails, you stay in the builder with the error.
- The Templates page opens for your page, headed Templates for your page's name, with ← Back to your page's name. Search, filter and preview templates as usual; every tab's templates work, including My templates.
- Click a template, or Use template in its preview. Instead of asking where to use it, it asks How do you want to use template on your page?
- Replace this page swaps the page's sections for the template's. - Add below the page content keeps everything and adds the template's sections at the bottom. - Add above the page content keeps everything and adds the template's sections at the top.
- You're back in the builder with the template in place: "“template” applied — review and Save" (or "added below" / "added above"). Your saved page doesn't change until you Save draft; leave without saving to keep it as it was.
Template images
Every photo our templates use is kept for you. If you replace or delete one, you can get it back:
- Select the block, then click Choose from library in its image setting.
- Click the Template images tab, next to Your library.
- Find the photo with Search template images or the group buttons (All, then one per template category; landing-page photos are under Landing · groups such as Landing · Sales, and blog-post photos under Blog posts), and click it.
Template images are shared by every site and don't count against your storage. Use them as often as you like.
Your own templates
Save any page as a template, or build one from scratch, then reuse it from My templates. See Your own templates: save, create, edit and delete.
What happens next
- The new page appears in your pages list as a Draft.
- Visitors can't see it until it's published. Its address will be
yourname.zinstruct.com/followed by its URL. - Found a section you want to reuse? Select it and click Save as reusable section, then add it to any page with Insert saved section….
- Save current as template in the Style Guide saves colours and fonts, not a page layout: it won't create a page. To reuse a whole page layout, use Save as template in the builder (below).
- Building a standalone page for a campaign, without your site's menu and footer? Use a landing page instead.
Common errors
- "You don’t have permission to do that.": you're signed in as a viewer. Ask a teammate with the Staff role or higher.
- "That template isn’t available any more. Pick another one." on the Templates page: the template was deleted. Pick another one.
- "We couldn’t create the page. Try again in a moment.": click the card again.
- "You don’t have permission for this." after Publish: staff can save drafts but only owners and admins can publish. Your draft is saved.
- The Offer or Form block is empty on your page: pick an offer or form in the block's setting, then save.