Each offer has its own checkout settings. On the offer's Checkout tab you choose what the checkout asks for, add a terms box, turn on two-step opt-in or an exit popup, and pick where buyers land after paying. A live Checkout preview beside the forms updates as you type. Limits that close the checkout live on the Details tab.
Who can do this
- Owners and admins, on any plan.
- Staff and viewers can look, but saving shows "You don’t have permission to do that."
- The Checkout, Checkout fields and Checkout conversion panels don't show a "Saved" message. The page refreshes with your settings; check the preview.
Checkout options
- Open the offer from Revenue → Offers and click the Checkout tab.
- In the Checkout panel, tick what you need: Collect phone number, Collect billing address, Offer Buy-Now-Pay-Later (Afterpay / Klarna) and Allow this offer to be sent as a gift. Buy-now-pay-later is hidden for subscription offers, and the gift box for subscription and payment-plan offers; checkout uses both only for one-time payments.
- Service agreement (optional): paste your terms. Buyers must tick them before paying.
- Click Save checkout options.
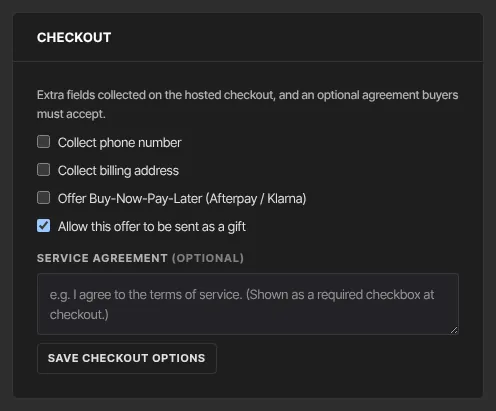
For gifting, see Let buyers send an offer as a gift.
Checkout fields
- In Checkout fields, tick Collect Tax ID for business buyers.
- Add up to three custom fields: a label (leave blank to switch it off), Text or Number, and Required if needed.
- Click Save checkout fields.
Buyers answer these on the secure payment page. Answers appear in the order's details in Revenue → Transactions (the panel still calls it "Sales → Orders").
Checkout conversion
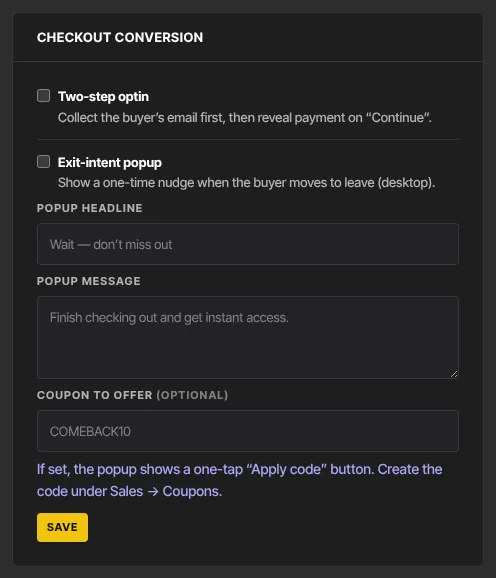
- Two-step optin: the checkout asks for the email first and shows the rest after Continue. Signed-in members skip straight to payment.
- Exit-intent popup: a one-time nudge when a buyer on a computer moves to leave the page. It doesn't appear on phones. Fill in Popup headline and Popup message.
- Coupon to offer (optional): the popup then shows an Apply code button that fills the discount box. The popup doesn't check the code, so type it exactly as created in Revenue → Discounts and make sure it's active and valid for this offer, or buyers get "That code is not valid."
- Click Save.
After purchase
- In After purchase, keep Member’s product library or choose Custom thank-you / landing page.
- For a custom page, enter the Redirect URL, starting with https://.
- Click Save. Saved appears.
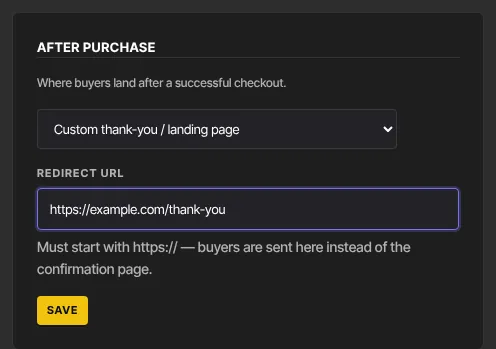
After paying (and after any upsell steps), buyers go to your page instead of the You’re in. confirmation. A free claim goes straight to the member's library, so the custom page isn't used for free offers unless they have upsell steps, which end on it.
Stop selling after a date or a number of buyers
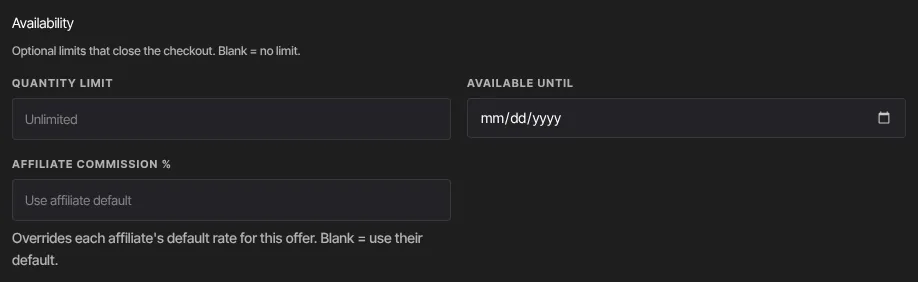
- On the Details tab, find Availability.
- Quantity limit: stop selling once this many people have bought. It counts different people with a completed purchase or free claim; a refund frees a place, and trial starts count only once they pay.
- Available until: the checkout closes at the end of that day (UTC).
- Affiliate commission %: overrides each affiliate's default rate for this offer. Blank uses their default. See How affiliate commission rates are decided.
- Click Save changes.
What happens next
- New settings apply to the next checkout.
- A closed offer shows buyers "This offer has closed" ("The window to purchase this offer has ended.") or "This offer is sold out" ("All available spots have been claimed."). The same limits stop it selling as an order bump, upsell or cart item.
Common errors
- A buyer sees "Please accept the agreement to continue.": they didn't tick your service agreement.
- A buyer sees "That code is not valid." from the popup: the Coupon to offer code doesn't exist, was archived, or isn't valid for this offer. Fix the code and save.
- "Could not save.": try again.
- "You don’t have permission to do that.": ask an owner or admin.