Every offer's checkout page has two columns: your content, and the order panel where buyers pay. You can design the content column for each offer with the page builder, and set the pay button's label, colour and a reassurance note once for every checkout.
Who can do this
- Owners and admins, on any plan.
- Staff and viewers clicking Edit checkout page are sent back to the offer's page. On Settings → Checkout they see only "Only owners and admins can edit checkout settings."
Design an offer's checkout page
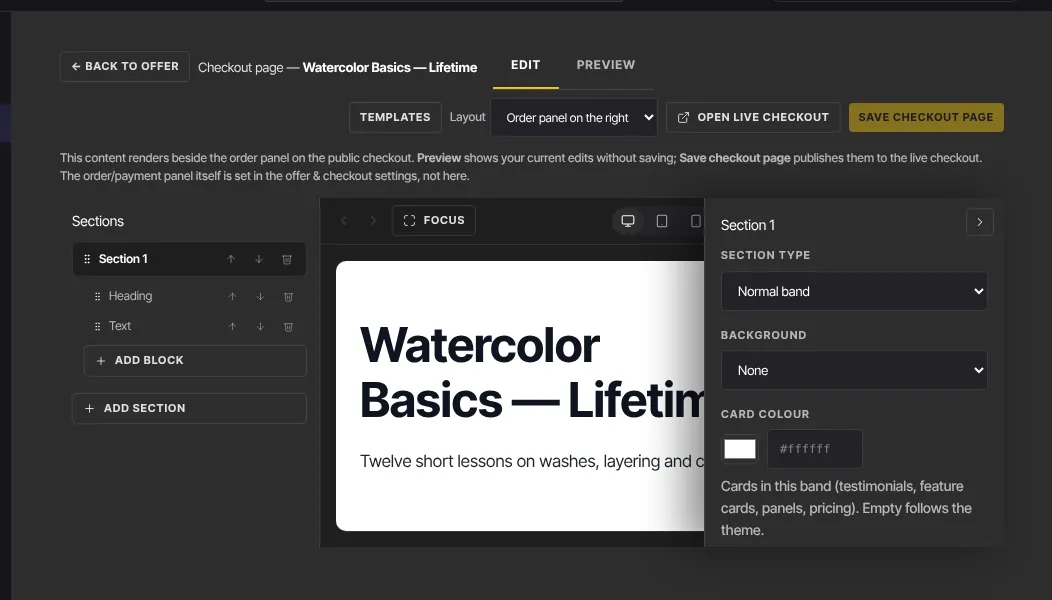
- Open the offer from Revenue → Offers and click Edit checkout page at the top. The builder opens, titled "Checkout page —" and the offer's name.
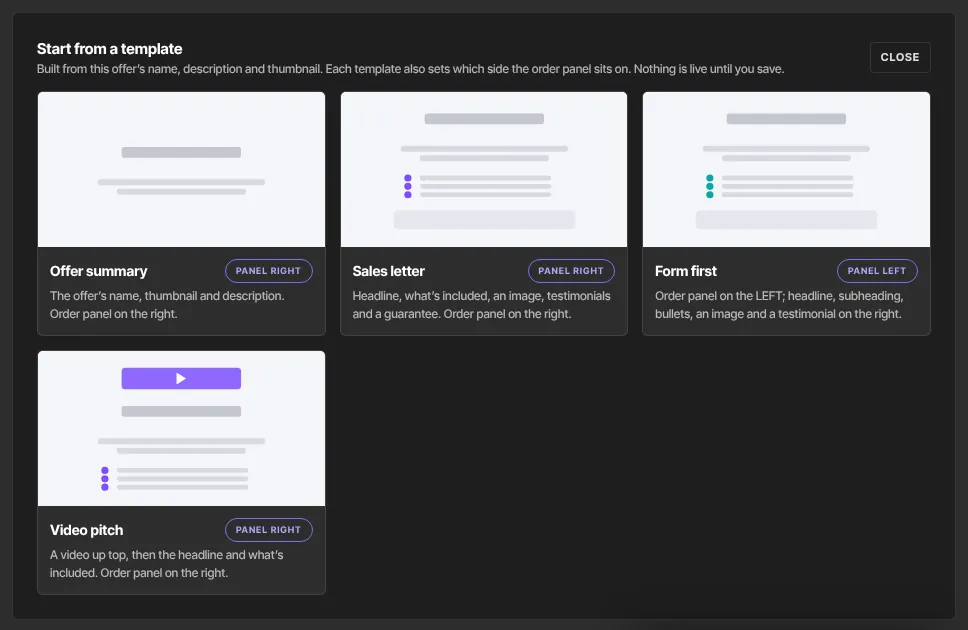
- To start from a design, click Templates. Under Start from a template, pick Offer summary, Sales letter, Form first or Video pitch. Each is built from the offer's name, description and thumbnail and sets which side the order panel sits on. Confirm with Yes, replace, or click Keep my content.
- Add and edit blocks such as text, images, video and testimonials. It's the same builder as your website, and it uses your site's Style Guide colours and fonts. See Edit pages with the builder.
- Choose a Layout: Order panel on the right or Order panel on the left.
- Click the Preview tab to see unsaved edits beside a sample order panel. Edit goes back.
- Click Save checkout page. Saved appears and the change is live. Open live checkout shows it; ← Back to offer returns.
Leave the column empty and buyers see the default summary: You’re getting, the product's image and the offer's description, plus an Includes list for bundles.
Brand the pay button for every checkout
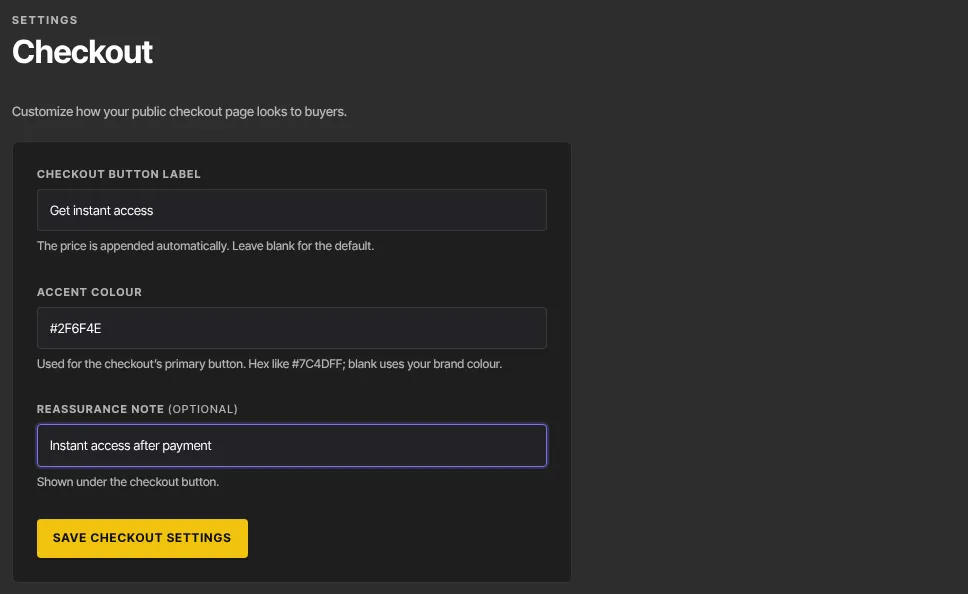
- Go to Settings → Checkout (
/settings/checkout). - Checkout button label: the price is added automatically, so "Get instant access" shows as "Get instant access · $97.00". Leave it blank for the default, Pay $97.00 USD.
- Accent colour: a hex colour like #7C4DFF for the button. Blank uses your brand colour.
- Reassurance note (optional): a short line under the button.
- Click Save checkout settings. Saved appears.
These apply to every offer's checkout. The cart has its own button settings; see The shopping cart.
What the order panel shows
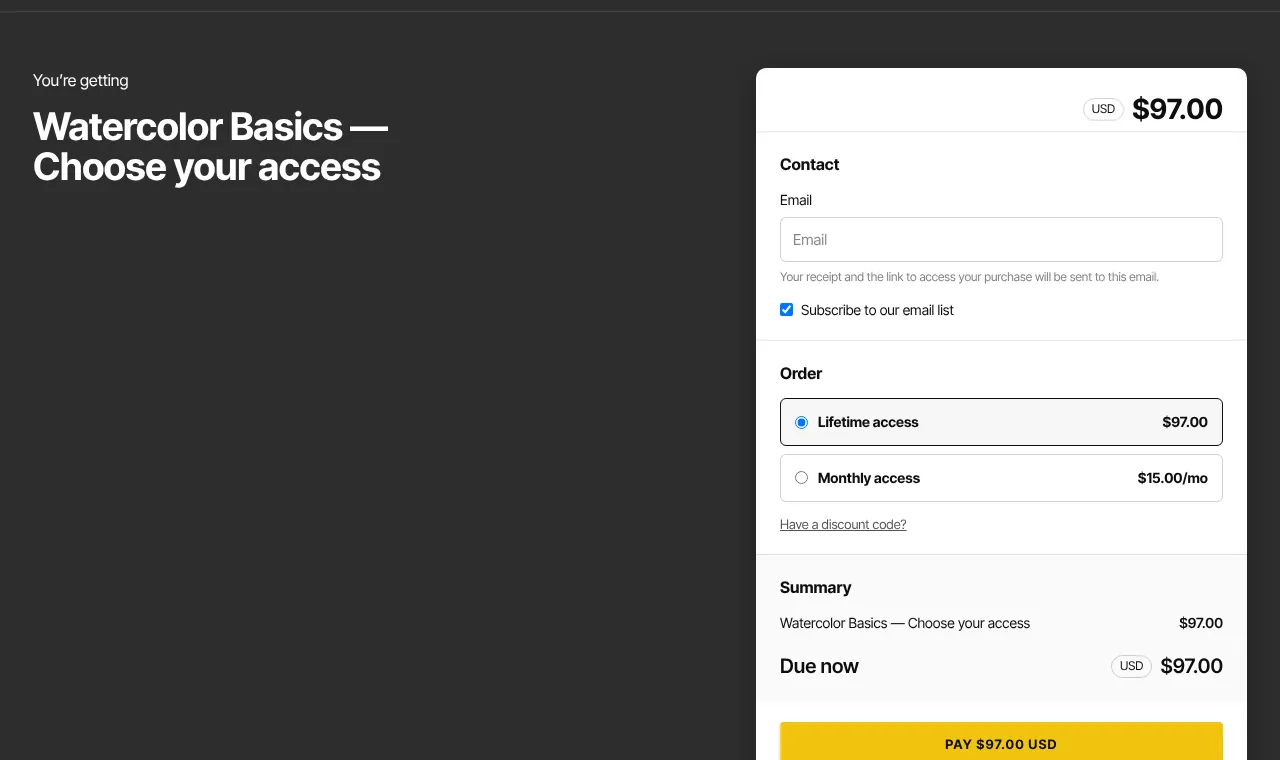
You don't design the order panel; your offer settings fill it in:
- The price, with any pricing options or a Name your price box (Pricing types).
- Contact: Email, and Subscribe to our email list, ticked by default on paid checkouts.
- Order: order bumps (Order bumps), Send as a gift, Have a discount code? on every paid checkout, and your service agreement.
- Summary with Due now, then the pay button and your reassurance note.
What happens next
- Saved designs and button settings show to buyers straight away.
- After paying, buyers see You’re in. or your custom after-purchase page; see Checkout options, fields and availability.
Common errors
- "The page contains invalid content — undo the last change and try again.": undo your last edit, then save.
- "Unknown checkout layout.": pick a layout from the list again.
- "Could not save the checkout page." or "Could not save checkout settings.": try again in a moment.
- "Only owners and admins can edit the checkout page." or "Only owners and admins can edit checkout settings.": ask an owner or admin.
- "Enter a hex colour like #7C4DFF": use # followed by 3 or 6 letters and numbers, or leave it blank.