Two settings pages shape how your email appears to the people who get it. Email sending sets the sender name, reply-to address and footer on every broadcast, sequence email and automation email you send. Email templates lets you change the subject and add an opening message to the automatic emails we send for you, such as purchase receipts. Reusable designs for your broadcasts live elsewhere: see Saved email templates.
Who can do this
- Owners and admins can change both pages.
- Staff and viewers can open Email sending, but saving shows "You don’t have permission for this."
- Staff and viewers who open Email templates see only "Only owners and admins can edit email templates."
- Neither page is limited to a plan. Sending from your own domain is: see Sending domains and deliverability.
Set your sender name, reply-to and footer
- Go to Settings and click Email sending (
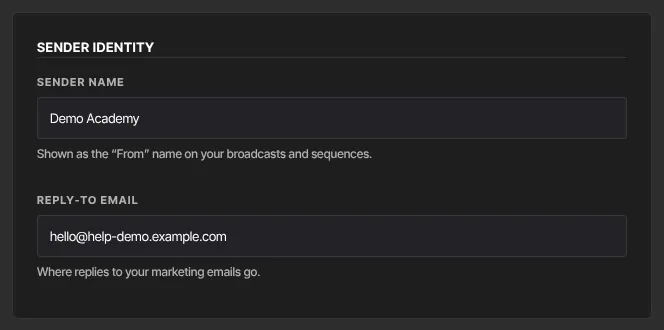
/settings/marketing). - Under Sender identity, type the Sender name your audience sees as the "From" name, and a Reply-to email where replies to your marketing email should go.
- Under Email footer, type your Business name and Mailing address, and an optional Footer note, such as a copyright line.
- Click Save email settings. The page shows Saved.
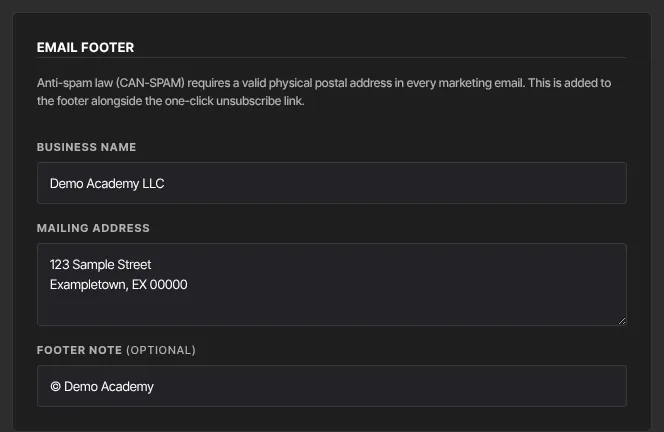
Anti-spam law (CAN-SPAM) requires a valid physical postal address in every marketing email, as the page reminds you. We add your business name, address and footer note to the bottom of each marketing email, above the unsubscribe link. Nothing stops a send when the address is empty, so it's up to you to fill it in.
Until you verify your own sending domain, your email goes out from our shared address, with your sender name and reply-to applied.
Customize system emails
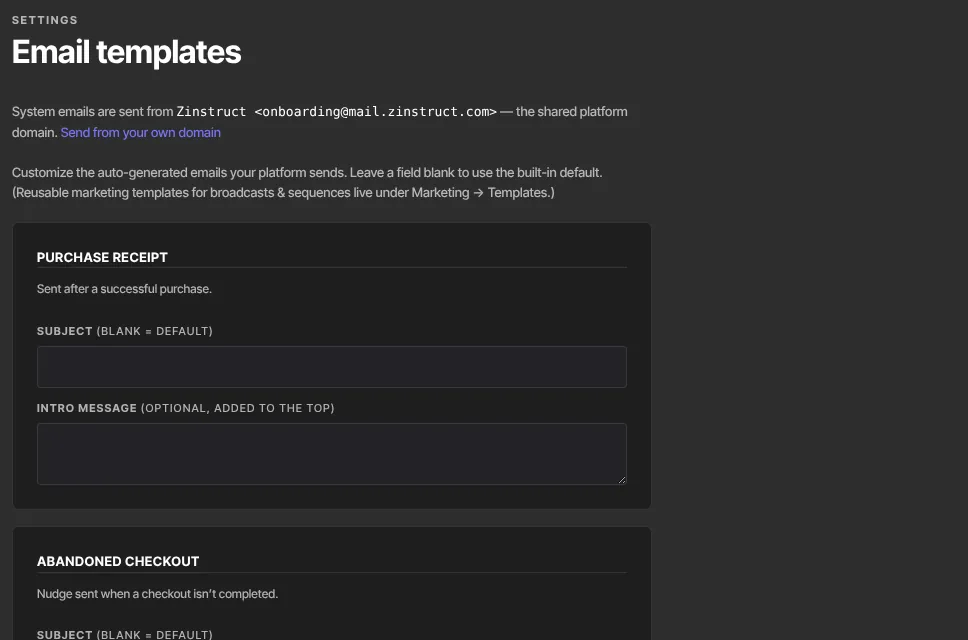
These are the automatic emails we send for your school. You can change the subject and add a short opening message to five of them; the rest of each email stays as built.
- Go to Settings and click Email templates (
/settings/email-templates). A line under the heading shows which address these emails are sent from, with a link to your sending domain. - Each email has its own panel: Purchase receipt, Abandoned checkout, Payment failed, Certificate earned and Downsell offer.
- In Subject (blank = default), type your own subject, or leave it empty to keep ours.
- In Intro message (optional, added to the top), type a short message to show above the built-in text.
- Click Save email templates. The page shows Saved.
Good to know:
- The Purchase receipt settings also apply to the itemized receipt for a checkout with add-ons, and to the email someone gets when they receive a gift.
- Merge tags such as
{{ first_name }}aren't filled in on this page. Anything you type appears exactly as written. - The subject can be up to 200 characters and the intro up to 1,000.

What happens next
- New sender details and footer apply to the next broadcast, sequence email, automation email and test you send. Emails already sent don't change.
- New subjects and intros apply to the next system email of that kind. To go back to ours, clear the field and save.
- To send from your own domain instead of ours, see Sending domains and deliverability.
Common errors
- "Please fix the highlighted fields." with "Enter a valid email address" under Reply-to email: check the reply-to address, or leave it empty.
- "Could not save marketing settings." or "Could not save email templates.": try again in a moment.
- "Check the “…” fields.": a subject or intro on that panel is too long. Shorten it.
- "You don’t have permission for this.": only owners and admins can change Email sending.
- "Only owners and admins can edit email templates.": you're signed in as staff or a viewer. If you're the owner and your trial has ended, your workspace is read-only and shows this message too: subscribe in Settings → Billing.
- "Your free trial has ended, so your workspace is read-only…": subscribe in Settings → Billing to change settings again.