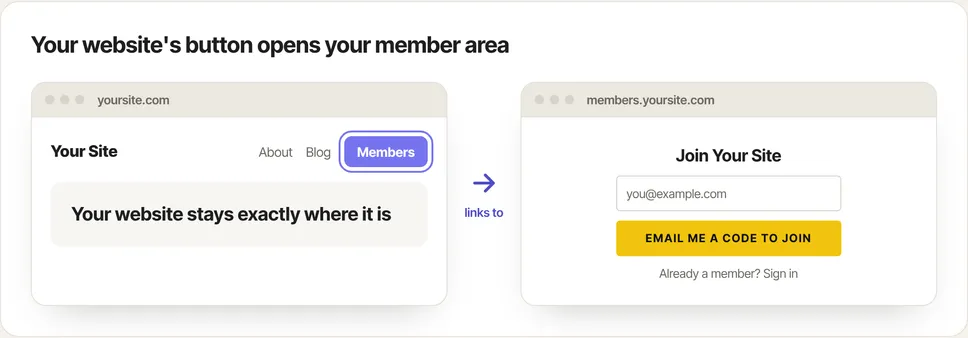
Your main website stays exactly where it is. Zinstruct lives on a subdomain, such as learn.yoursite.com, and your website links to it for member login and checkout. No coding needed.
Only own a domain name, with no website built yet? You don't need this article: connect your main domain (such as yoursite.com) under Custom domain and build your site with Zinstruct. See Connect your own domain.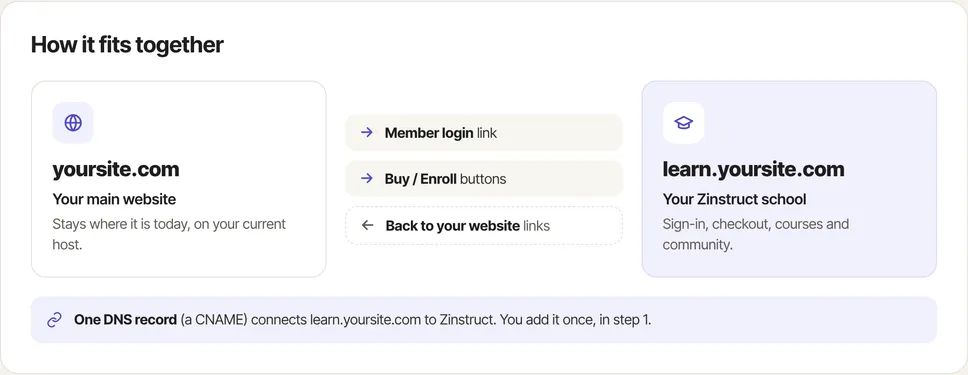
Who can do this
- Owners and admins can do every step. Connecting your own domain needs a plan that includes custom domains; without one, use your free address (step 1, option A).
Step 1: Give Zinstruct its own address
Go to Website → Domain (/website/domain).
- Option A, your free address:
yourname.zinstruct.comalready works. You can stop here and link to it. - Option B, a branded address: in the Custom domain panel, type
learn.yoursite.cominto Connect a domain you own and click Connect domain.
The subdomain can have any name. This article uses learn; members, courses, course, community, class and subscribers work just as well. Whichever you pick is where your website's buttons will link.
For option B:
- The panel shows the record to add: a CNAME whose Name is
learn. Add it whereveryoursite.com's DNS is managed, usually the company you bought the domain from. For Cloudflare, GoDaddy, Namecheap, Domain.com, Hostinger, Bluehost and DreamHost, the panel shows a Setup guide with where to click. - In the Name (or Host) box, type only
learn. Your DNS host adds.yoursite.comitself. Copy the Value exactly as shown. - Back in Zinstruct, click Verify connection until the status shows Active.
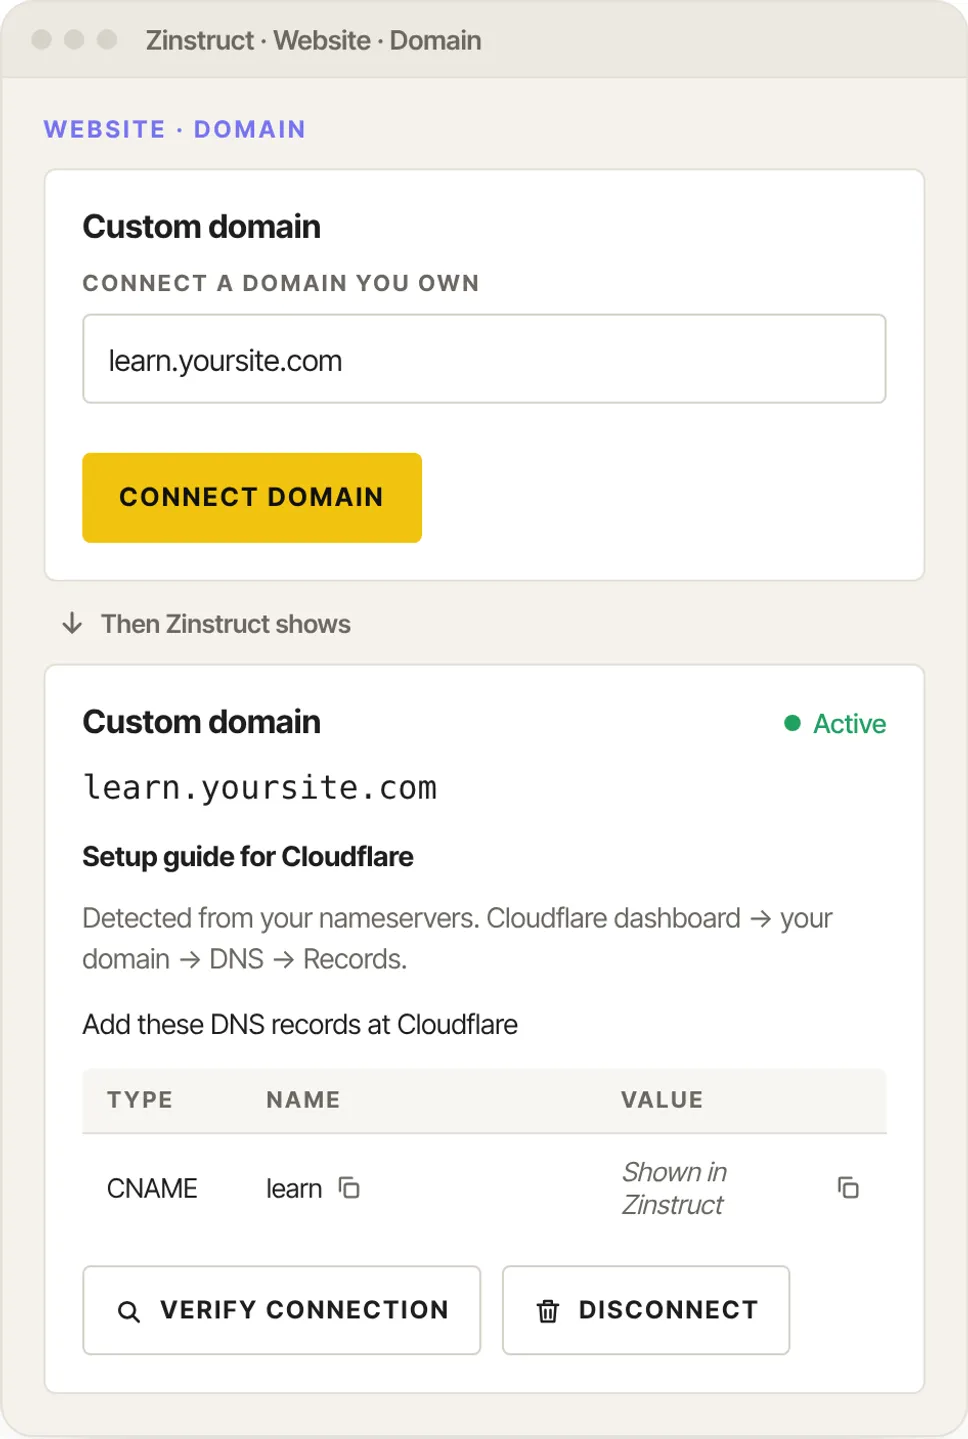
Enter a subdomain such aslearn.yoursite.com, never your main domain. Enteringyoursite.comitself would point your main website at Zinstruct.
Using Cloudflare? Set the record to DNS only (grey cloud), not Proxied (orange cloud). Proxying blocks the security certificate and can cause "too many redirects".
Full DNS details are in Connect your own domain and Add your domain records at your domain host.
Step 2: Tell Zinstruct about your main site
On the same page, scroll to Your website and member area:
- Under Do you already have a website you want to keep?, choose Yes, I have a website built on Squarespace, WordPress, Wix or similar.
- In Your website address, enter
https://yoursite.com. The panel now shows your two addresses:yoursite.comfor marketing andlearn.yoursite.comfor your member area. - Under When someone opens learn.yoursite.com, keep Show the sign-in / join page (recommended).
- Click Save. A green Saved badge appears beside the button.
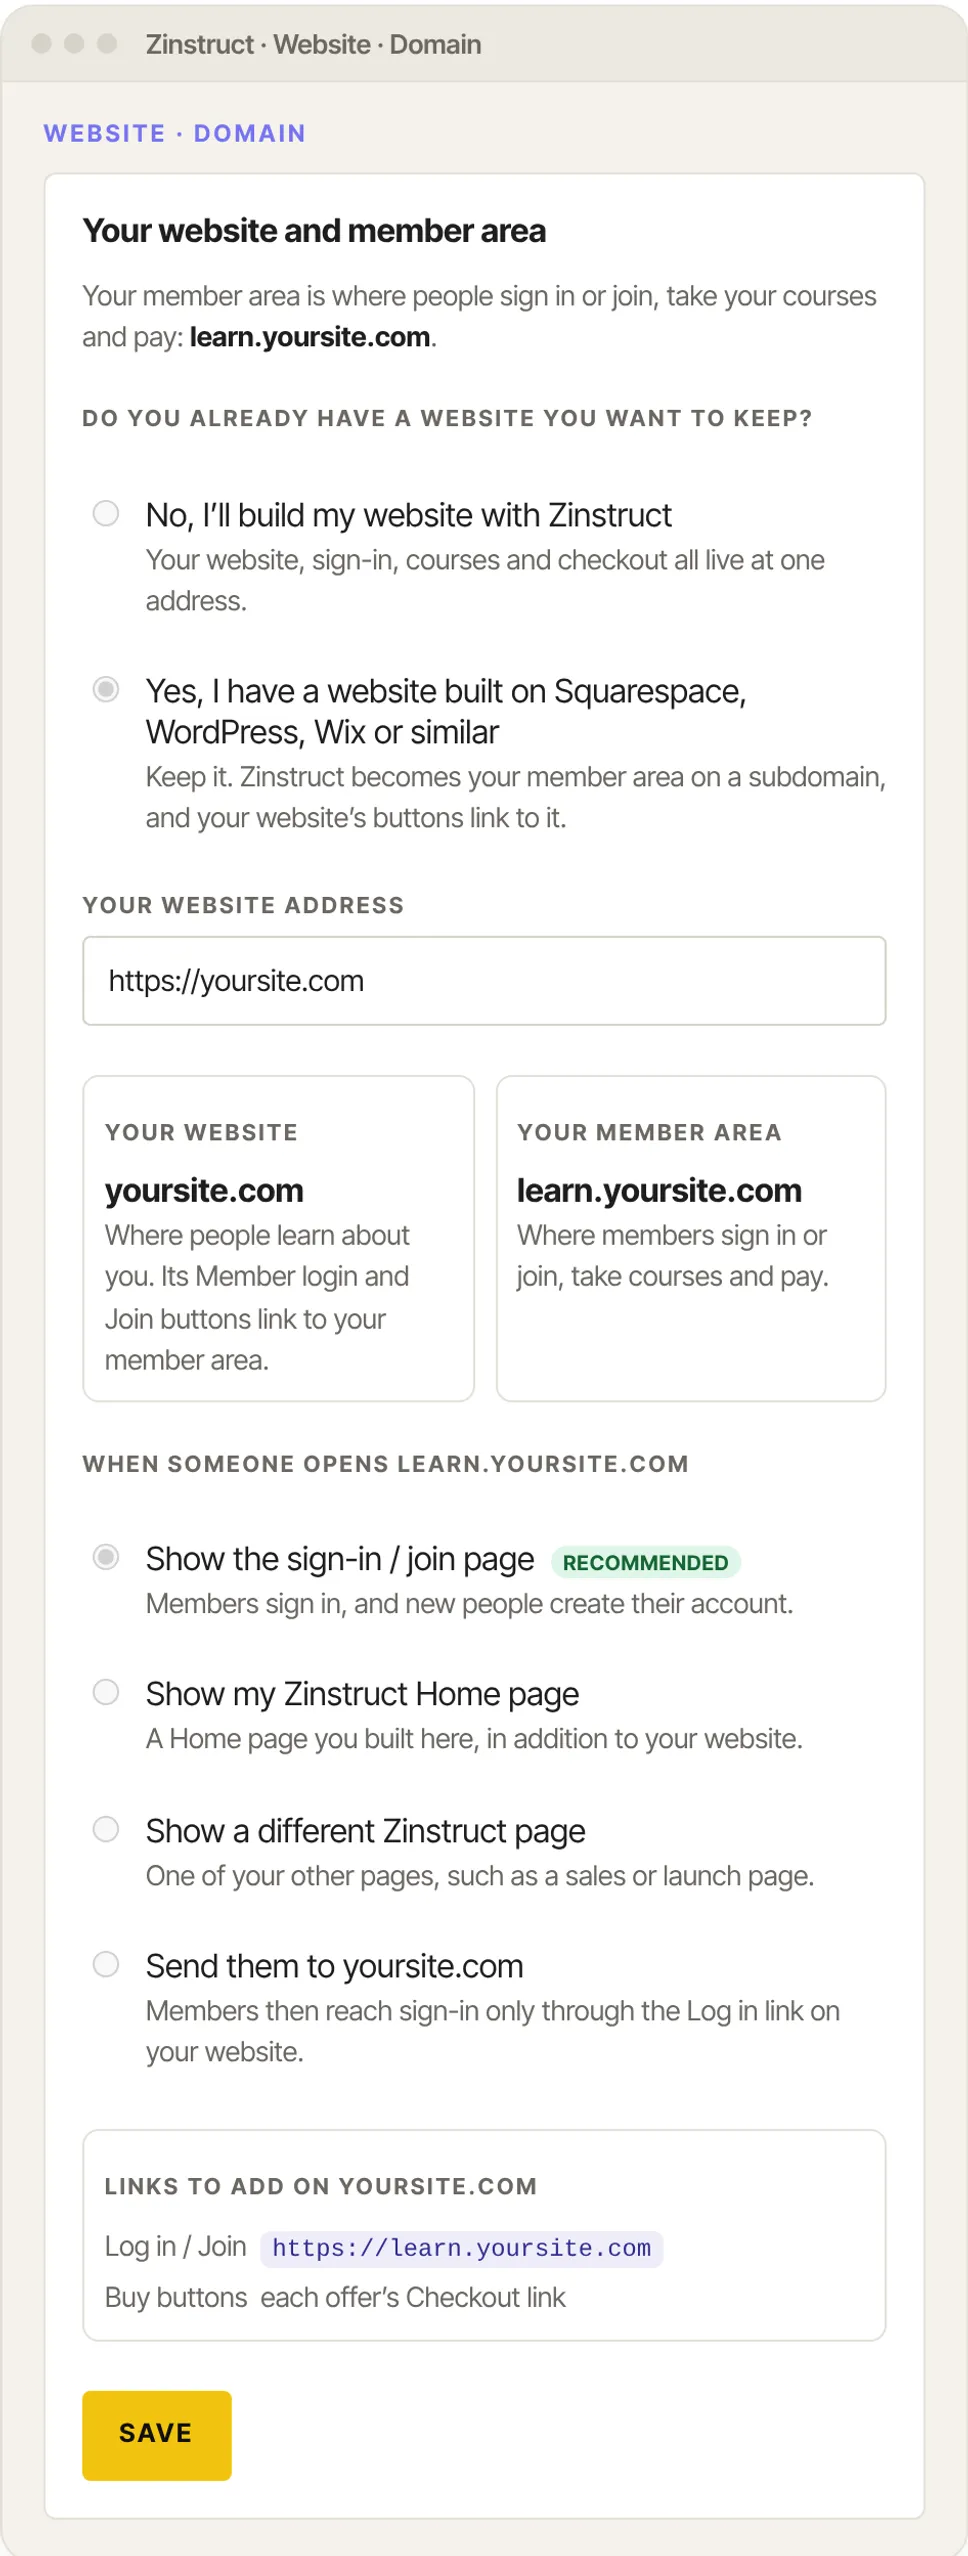
Anyone who opens learn.yoursite.com now lands on your Join page (members tap Already a member? Sign in), so you never need to build pages in Zinstruct. Your main website does the marketing. To send them to your website instead, choose Send them to yoursite.com.
Step 3: Add links on yoursite.com
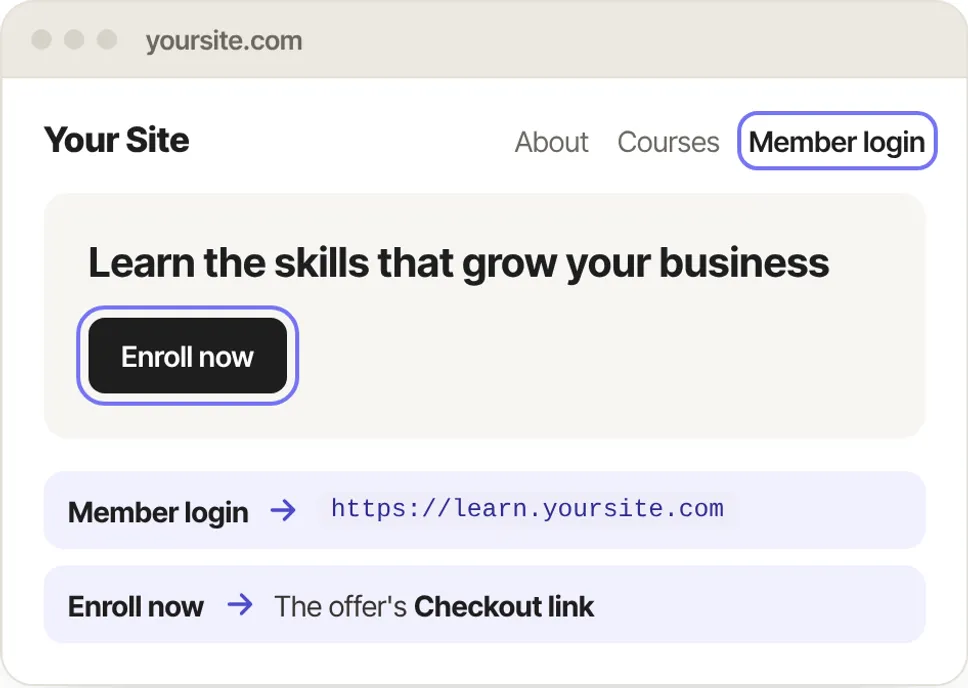
- Point your Log in (or Join) link to
https://learn.yoursite.com. The Links to add on yoursite.com box shows it with a copy button. - Point each Buy or Enroll button to that offer's checkout link: on the offer's page in Zinstruct, use the copy button next to Checkout link.
- Optional: embed a signup form. Open any form in Zinstruct and use its Embed tab. See Form defaults, bot protection and embedding a form.
What people experience
- A new customer clicks Enroll on your website, pays on a checkout with your school's name, and can click ← Back to <your site title> website there.
- A member clicks Member login, signs in, and uses their courses and community. The member area's top bar shows ← <your site title> website, and so does the sign-in page.
- Anyone typing the address
learn.yoursite.comlands on your Join page: a new person enters their email to create a free account, and a member taps Already a member? Sign in. Both get a code by email; there are no passwords.
The back links use your site title from Site Details. On member pages they appear only on your school's own address (learn.yoursite.com or yourname.zinstruct.com), not on app.zinstruct.com.
What happens next
- Once your domain is Active, your free
yourname.zinstruct.comaddress forwards tolearn.yoursite.com, so links you shared before keep working. - Changes under Your website and member area reach your live address on the next page load. There's no publish step.
- Your main website doesn't change. Only the links you add to it point here.
Common errors
- "Too many redirects" on your new address: usually an old forwarding or parking record at your DNS host, or Cloudflare's proxy. Turn off domain forwarding for the subdomain, set Cloudflare to DNS only, then try again in a private window: your browser may remember the old redirect.
- The status stays Pending DNS: the record hasn't been found yet. Check the Name is only
learnand the Value matches exactly, then click Verify connection again. DNS changes can take a few minutes, occasionally longer. - "Add your website address to send visitors there.": you chose to send people to your website with Your website address empty. Enter it and save again.