Webhooks send events from your school to your own systems the moment they happen: a sale, a new contact, a lesson completed. You give us an https address (an "endpoint"), choose which events it gets, and we send each event there as a signed message. Use them for bookkeeping, team alerts or your own database, without asking the API over and over.
Who can do this
- Owners and admins add and manage endpoints at Settings → Webhooks.
- Staff and viewers see "Only owners and admins can manage webhooks." An endpoint's page sends them back to that message.
- Plan: adding a new endpoint needs the Professional plan. The Add an endpoint form shows on every plan, but on a lower plan Create endpoint answers "Webhooks is included from the Professional plan up. Subscribe in Settings → Billing to unlock it." Endpoints you already have keep receiving events if your plan changes, and you can still edit, pause, resume and delete them. The exception is the hosted portal (see below): there, a plan without webhooks sends no events at all.

Add an endpoint
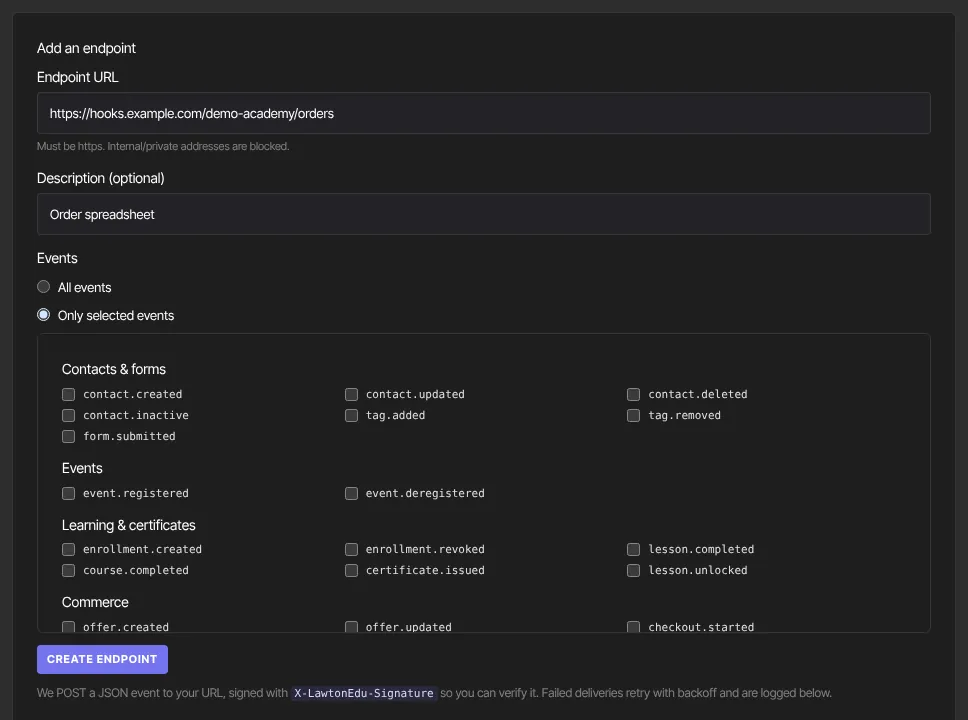
- Go to Settings → Webhooks (
/settings/webhooks), or click Manage webhooks on Settings → Integrations. - Under Add an endpoint, enter the Endpoint URL. It must start with
https://, use the standard port and be a public address. Internal and private addresses are blocked. - Optionally fill in Description (optional), such as "Bookkeeping sync".
- Under Events, choose All events, or choose Only selected events and tick the ones you want. They're grouped: Contacts & forms, Events, Learning & certificates, Commerce, Products & content, Media & storage, Website & blog, Email, Quiz funnels, Migration & import, and Team.
- Click Create endpoint.
- A yellow box shows "Endpoint created. Copy its signing secret now — it won’t be shown in full again:" and the secret, which starts with
whsec_. Click Copy and store it in your receiving system: it's how that system checks each delivery is really from us. If you miss it, an owner or admin can still see the full secret on the endpoint's page with Reveal.
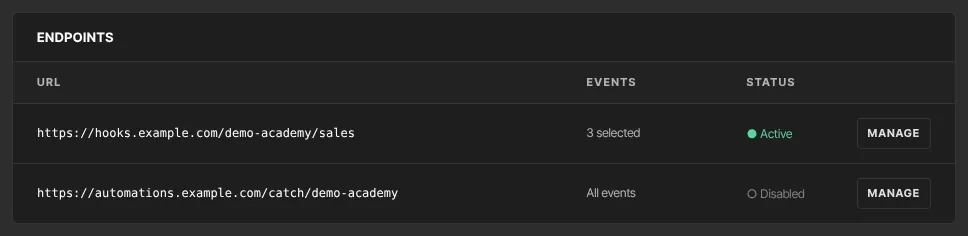
The endpoint appears under Endpoints with its URL, its events (All events, or how many are selected) and ● Active.
Learning and subscription events
The learning events all go out: lesson.completed and the quiz events as students work, course.completed when a student finishes a course, certificate.issued when that completion earns a certificate, and lesson.unlocked when a drip lesson opens for a student (at the same moment as their "new lesson unlocked" email).
- A certificate issued by the automation action Send a certificate doesn't send
certificate.issued. - If a lesson is marked complete again in a course the student has already finished,
course.completedandcertificate.issuedare sent again. Each one is a new event with its ownid, so check whether you've already handled that student and course.
A new subscription sends subscription.created once, then subscription.updated. Every later change sends subscription.updated, or subscription.canceled when it ends. All three carry the subscription's status, such as active or trialing. If you subscribe to both subscription.created and subscription.updated, a new subscription reaches you twice.
Manage an endpoint
- Click Manage on the endpoint's row. Its page shows the URL at the top.
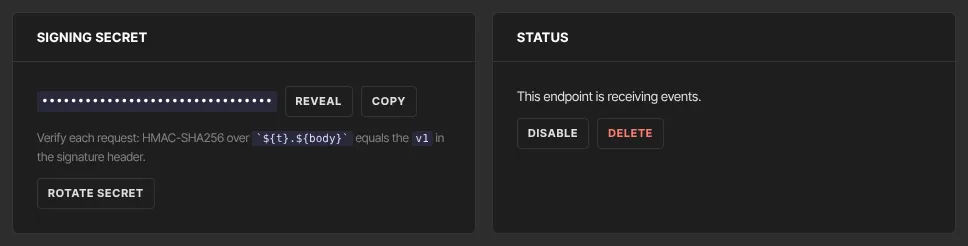
- Signing secret is hidden at first. Reveal shows it in full, Hide hides it again, and Copy copies it.
- Status says "This endpoint is receiving events." Click Disable to pause it; the panel then says "This endpoint is paused — no events are delivered." Click Enable to resume. Events that happen while it's paused are never sent later.
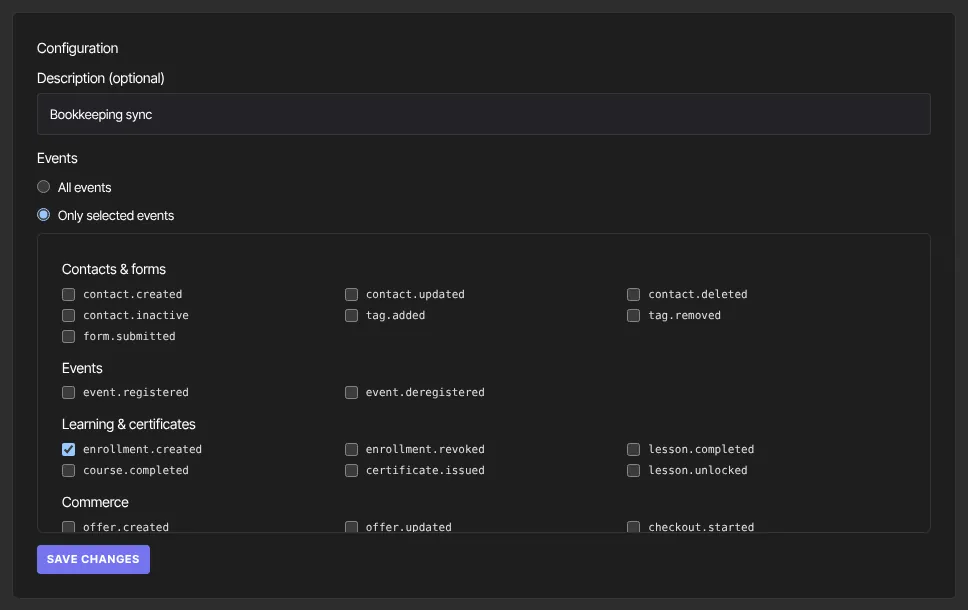
- Under Configuration, change the Description (optional) or the Events choice, then click Save changes. "Saved ✓" confirms it. The URL can't be changed: to move to a new address, add a new endpoint and delete the old one.
Rotate the signing secret
- On the endpoint's page, under Signing secret, click Rotate secret.
- A box shows "New signing secret — copy it now, it won’t be shown in full again:" with Copy.
The old secret stops working at once. Every delivery from then on, including retries of earlier events, is signed with the new one, so update your receiving system straight away.
Delete an endpoint
- On the endpoint's page, under Status, click Delete.
- You're taken back to Webhooks.
There's no confirmation, and the endpoint's delivery log is deleted with it. To stop deliveries for a while, click Disable instead.
When the Webhooks page shows a hosted portal
On some accounts Settings → Webhooks shows a Webhook manager panel instead of the form. There:
- Click Open webhook portal. A hosted portal opens.
- Add endpoints, read delivery logs, resend failed events and copy signing secrets in the portal.
- Have your receiving system check the
svix-signatureheader, using the signing secret the portal shows for that endpoint.
Endpoints you added on the form before the portal was switched on are copied into it, so they keep receiving events and show up in the portal. So do endpoints added with the signed-in JSON API. For each of them, use the secret the portal shows, not the one from the form.
The portal needs the Professional plan. On a lower plan, Open webhook portal brings you back to Webhooks, and no events go to any endpoint. Events that happen while you're on that plan aren't sent later, once you upgrade.
If the button doesn't open the portal on the Professional plan, or an endpoint you added earlier is missing from it, contact support.
What happens next
- Matching events start going to the endpoint straight away. Receive webhooks explains what each delivery contains, how to check its signature, and retries.
- Every event type, and the fields each one carries, is listed in the public developer docs at developers.zinstruct.com/webhooks.
- The Webhooks row on Integrations counts your endpoints.
- Nothing is emailed when you add or change an endpoint.
Common errors
- "Webhooks is included from the Professional plan up. Subscribe in Settings → Billing to unlock it.": your plan doesn't include new endpoints. See Plans and billing.
- "Endpoint URL must use https": change
http://tohttps://. - "Endpoint URL must be a public host" or "Endpoint URL must not point to a private address": use an address reachable on the internet, not
localhostor a private network. - "Endpoint URL must use the default https port": remove the port number, such as
:8443. - "URL must not carry credentials": remove the
name:password@part. - "Contains an unknown event type": reload the page and pick events again.
- "Could not create the endpoint.", "Could not save changes." or "Could not rotate the secret.": try again.
- "Your free trial has ended, so your workspace is read-only. Subscribe in Settings → Billing to start creating again — nothing has been deleted.": choose a plan to make changes.